Blog

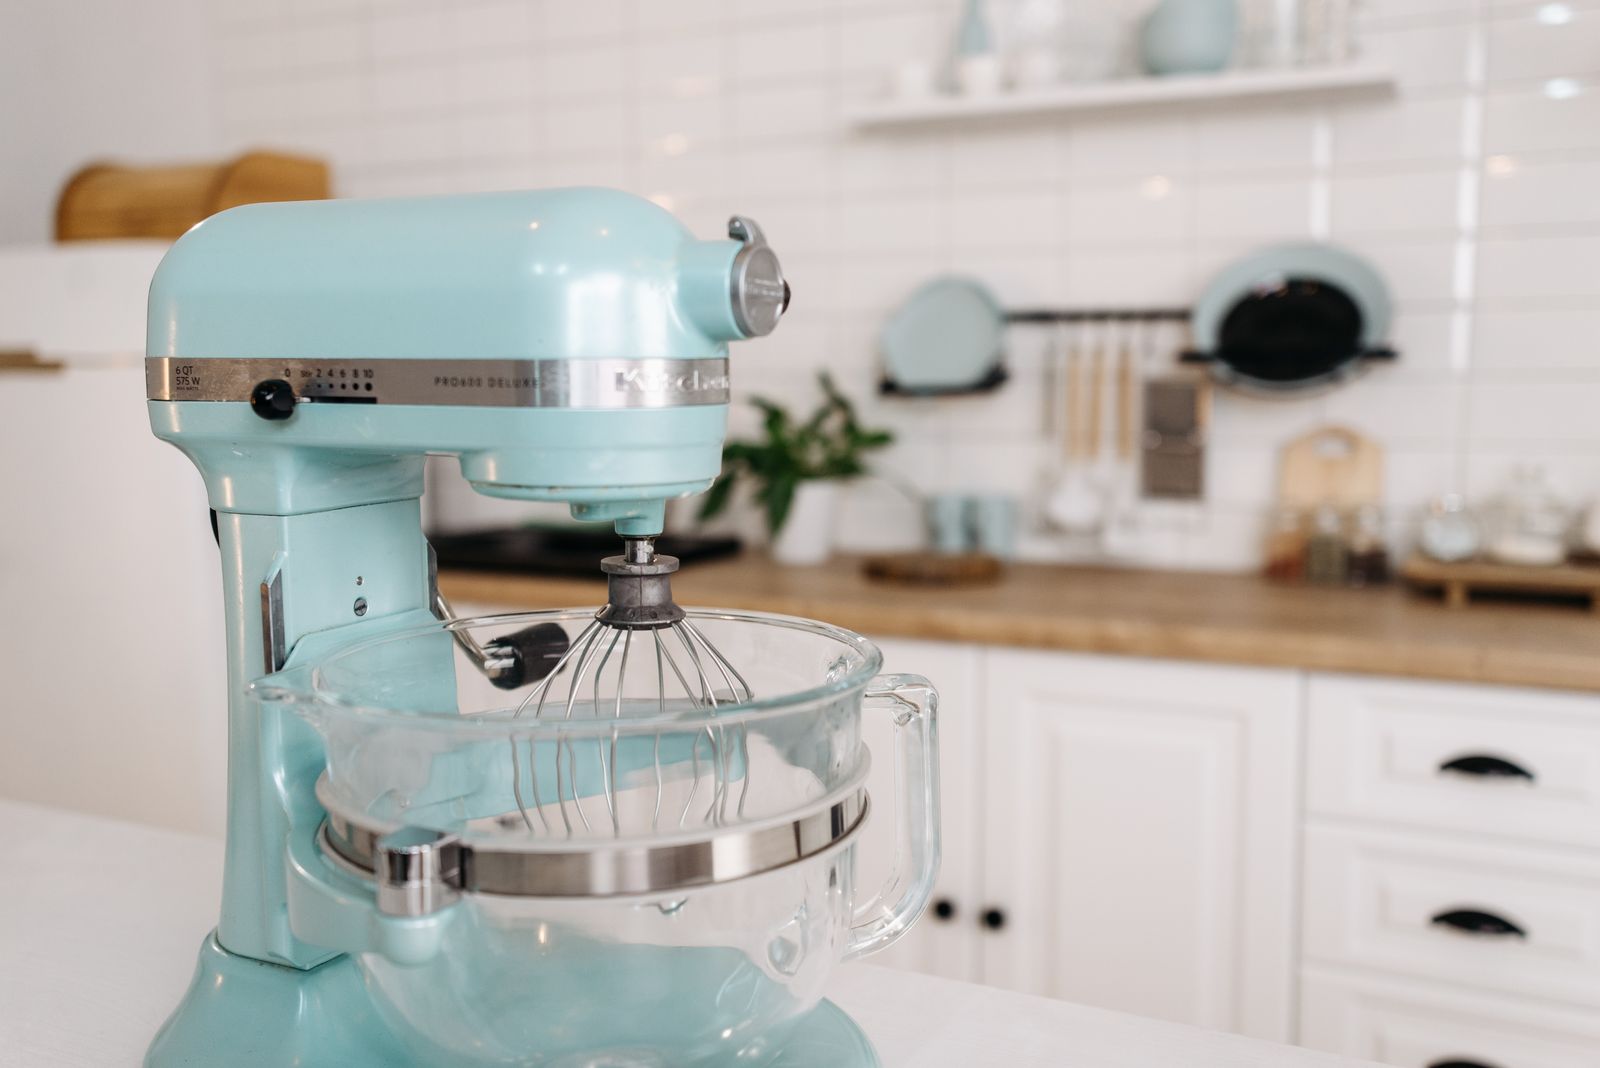
  • Stand Mixer Face-Off: KitchenAid vs Cuisinart vs Hamilton Beach

    Stand Mixer Face-Off: KitchenAid vs Cuisinart vs Hamilton Beach

    Some links on our site may earn us a commission at no extra cost to you. Learn more.

    A stand mixer is the most emotional appliance purchase in the kitchen. Nobody heirlooms a toaster, but stand mixers get named, color-matched to backsplashes, and handed down between generations — which is exactly why buying one is so fraught. KitchenAid casts the longest shadow in the category, Cuisinart undercuts it with more power on paper for less money, and Hamilton Beach asks a quietly subversive question: what if you spent a fraction of the price and still got your bread kneaded?

    The stakes are real because the failure modes are so different. Buy too little mixer and it will strain, walk across the counter, and overheat the first time you attempt a double batch of bagel dough. Buy too much and you have spent a mortgage payment on an appliance that whips cream eight times a year. The right answer depends on how often you bake, what you bake, and whether the mixer is a tool or a fixture in your kitchen’s identity.

    Quick answer: KitchenAid remains the best overall stand mixer for regular bakers thanks to its build quality and unmatched attachment ecosystem; Cuisinart is the value sweet spot with strong performance for the price; Hamilton Beach is the honest budget pick for occasional bakers who refuse to overspend. For more kitchen face-offs like this one, browse our full Kitchen & Cooking category.

    Our verdict at a glance

    • Best overall: KitchenAid — the build quality, ecosystem, and longevity that made it the default
    • Best budget: Hamilton Beach — legitimate mixing performance at an almost suspicious price
    • Best upgrade: KitchenAid bowl-lift models — the move for serious bread and big-batch bakers
    • Best value for regular bakers: Cuisinart — the strongest performance-per-dollar in the middle tier

    How the three brands compare

    AttributeKitchenAidCuisinartHamilton Beach
    Price tier$$–$$$$$$
    Build quality and feelExcellentVery goodFair
    Heavy dough capabilityVery good (excellent on bowl-lift)GoodLight duty only
    Attachment ecosystemUnmatchedModestMinimal
    Expected lifespanLongestLongAdequate
    Resale and repairabilityExcellentFairLow

    Before the deep dives, one framing note: these three brands are not really fighting over the same buyer. KitchenAid is selling a fifteen-year relationship, Cuisinart is selling smart value to people who bake most weekends, and Hamilton Beach is selling a reality check to everyone who was about to overbuy. Deciding which buyer you are does most of the work of deciding which mixer to get. It also explains why the reviews for all three skew positive at the same time — each machine mostly satisfies the buyer it was actually built for, and most of the horror stories trace back to a mismatch between the mixer and the workload rather than a defective product.

    KitchenAid: the default for a reason

    KitchenAid did not become the category’s shorthand by accident. The all-metal construction gives its mixers a planted, vibration-damping heft that cheaper machines cannot fake, the planetary mixing action reaches the bowl’s edges reliably, and the fit and finish still feel like a product designed to be displayed as much as used. More importantly, the platform is genuinely long-lived: these machines are commonly repaired rather than replaced, parts availability is excellent, and owners consistently describe using inherited units that are decades old.

    The attachment hub is the moat. The front power port drives a whole ecosystem — pasta rollers, grain mills, spiralizers, food grinders — that turns the mixer into a modular kitchen machine. No competitor comes close, and for many owners the attachments end up justifying the purchase more than the mixing does.

    Honest drawbacks: you pay for the badge as well as the machine, and the entry-level tilt-head models are not the tireless workhorses the brand’s reputation implies — knead very stiff, low-hydration doughs back to back and they will run hot and struggle, which is the most common complaint from serious bread bakers. The machines are also heavy to move and tall enough under cabinets to matter, and the color-and-model matrix is baffling to shop. If you want KitchenAid for heavy weekly bread duty, the answer is the larger bowl-lift design, which costs meaningfully more.

    Buy it if you bake regularly, want attachments now or later, and value a machine you will repair rather than replace. Skip it if you bake a few times a year — the premium buys longevity you will never use.

    One money-saving note for this brand specifically: because the platform changes so slowly and the machines last so long, the secondhand and refurbished market is unusually safe here. A well-kept older unit is often the smartest way into the ecosystem, and it is a route that simply does not exist for the budget brands, whose used machines carry most of their limited lifespan already spent.

    Cuisinart: the rational middle

    Cuisinart’s stand mixers are built around a simple pitch: more motor and more included extras than the equivalent KitchenAid, for less money. The spec sheets back it up — higher wattage ratings, larger standard bowls on some models, and boxes that include splash guards and multiple beaters that cost extra elsewhere. In actual use the mixers are quiet, capable, and pleasant: cookie dough, cake batters, buttercreams, and moderate bread doughs are all comfortably within their range.

    Where it wins: performance per dollar for the weekend baker. If you bake most weeks but are not routinely producing multiple loaves of dense bread, a Cuisinart delivers most of the flagship experience at a mid-tier price, and its die-cast housing feels far closer to premium than its price suggests. The controls are straightforward, and the slow-start behavior on many models keeps flour in the bowl instead of on the counter.

    Honest drawbacks: wattage is marketing, not measurement — a higher number on the box does not translate directly into more kneading ability, and in sustained heavy-dough work Cuisinart mixers sit clearly behind KitchenAid’s bowl-lift machines. The attachment story is the bigger gap: Cuisinart’s accessory range is modest, so if pasta rollers and grinders are part of your plan, the ecosystem argument tilts hard against it. Long-term parts and service support, while reasonable, does not match the near-universal repairability of the market leader, and resale value is noticeably weaker.

    Buy it if you want serious everyday mixing capability at the best mid-range price and do not care about a big attachment ecosystem. Skip it if heavy bread doughs are your main event or you are buying into a decades-long attachment plan.

    Hamilton Beach: the budget reality check

    Hamilton Beach’s stand mixers exist to answer one question honestly: how much mixer does an occasional baker actually need? For the person who makes cookies for the holidays, a birthday cake or two, and the odd batch of muffins, the answer is “much less than the premium brands are selling.” These machines cream butter and sugar, whip cream, and handle standard batters perfectly competently, with planetary mixing action on current models and controls anyone can operate on the first try.

    Where it wins: price, weight, and honesty. It costs a fraction of the premium options, it is light enough to pull from a cabinet without ceremony — a real advantage for people who will not dedicate counter space — and it does not pretend to be a commercial machine. For gift-giving, first apartments, and anyone testing whether baking will actually become a hobby, it is the low-risk entry point.

    Honest drawbacks: the plastic-heavy build feels its price, and the light body means the mixer can shimmy on the counter with stiff doughs — when it can handle them at all. Dense bread and bagel doughs are genuinely outside its comfort zone, and the most common complaint from owners is strain and hot smells when they push it there anyway. Speed control is coarser than the premium machines, attachments are essentially limited to what comes in the box, and when it eventually wears out, replacement is the plan rather than repair.

    Buy it if you bake occasionally, want to test the hobby before investing, or need a functional mixer at the lowest reasonable price. Skip it if you bake bread, bake weekly, or expect this to be the last mixer you buy.

    How we compared

    We compared each brand’s current lineup on the factors that decide long-term satisfaction: mixing performance across batters and doughs, build quality and stability, capacity, attachment and accessory ecosystems, repairability, and total cost of ownership. We weighted sustained real-world use over spec-sheet wattage, leaned on the consistent patterns in long-term owner experience — including what fails and when — and considered each machine against its own price tier rather than holding a budget model to flagship standards. As always, prices appear as tiers ($, $$, $$$) because street prices move constantly. The same method drives our air fryer comparison and our skillet material showdown.

    Frequently asked questions

    Is a KitchenAid really worth the premium?

    If you bake regularly and keep appliances for a decade or more, usually yes — the longevity, repairability, and attachment ecosystem spread the extra cost over many years. If you bake occasionally, usually no; the cheaper brands will do the same jobs for the life you will actually give them.

    Tilt-head or bowl-lift — which style should I get?

    Tilt-head models are easier to load, easier to scrape, and fit better under cabinets, which makes them right for most home bakers. Bowl-lift designs are more stable with large, stiff doughs and bigger batches. Choose bowl-lift only if bread or double batches are your normal, not your exception.

    Do higher watts mean a stronger mixer?

    Not reliably. Wattage measures electricity drawn, not force delivered to the dough — gearing, motor type, and build efficiency matter more. It is one of the least useful numbers on the box, which is why we compare mixers by what they can actually knead instead.

    What size bowl do I need?

    For most households, a bowl in the four-and-a-half to five-and-a-half quart range covers everything from a single cake to a double cookie batch. Go larger only if you regularly bake for crowds — oversized bowls actually mix small quantities worse, because the beater cannot reach a shallow layer of ingredients.

    Can a stand mixer replace a food processor?

    Not by itself — mixers excel at doughs, batters, and whipping, while processors chop, shred, and puree. The exception is KitchenAid’s hub attachments, which can add grinding, slicing, and shredding to the mixer over time. That is the strongest practical argument for its ecosystem.

    Bottom line

    The stand mixer market has a refreshingly clean answer key. Bake often, plan to keep it forever, or want the attachment universe: buy the KitchenAid and stop second-guessing — it is the default because it earns it. Bake most weekends and want the smartest dollar-for-dollar machine: the Cuisinart is the quiet overachiever of the middle tier. Bake occasionally: the Hamilton Beach will do everything you actually ask of it for a fraction of the spend, and there is no shame in matching the tool to the workload. Whichever tier you choose, buy for the baker you are, not the one you aspire to be — and if your countertop upgrade spree continues, our coffee brew method comparison is waiting.
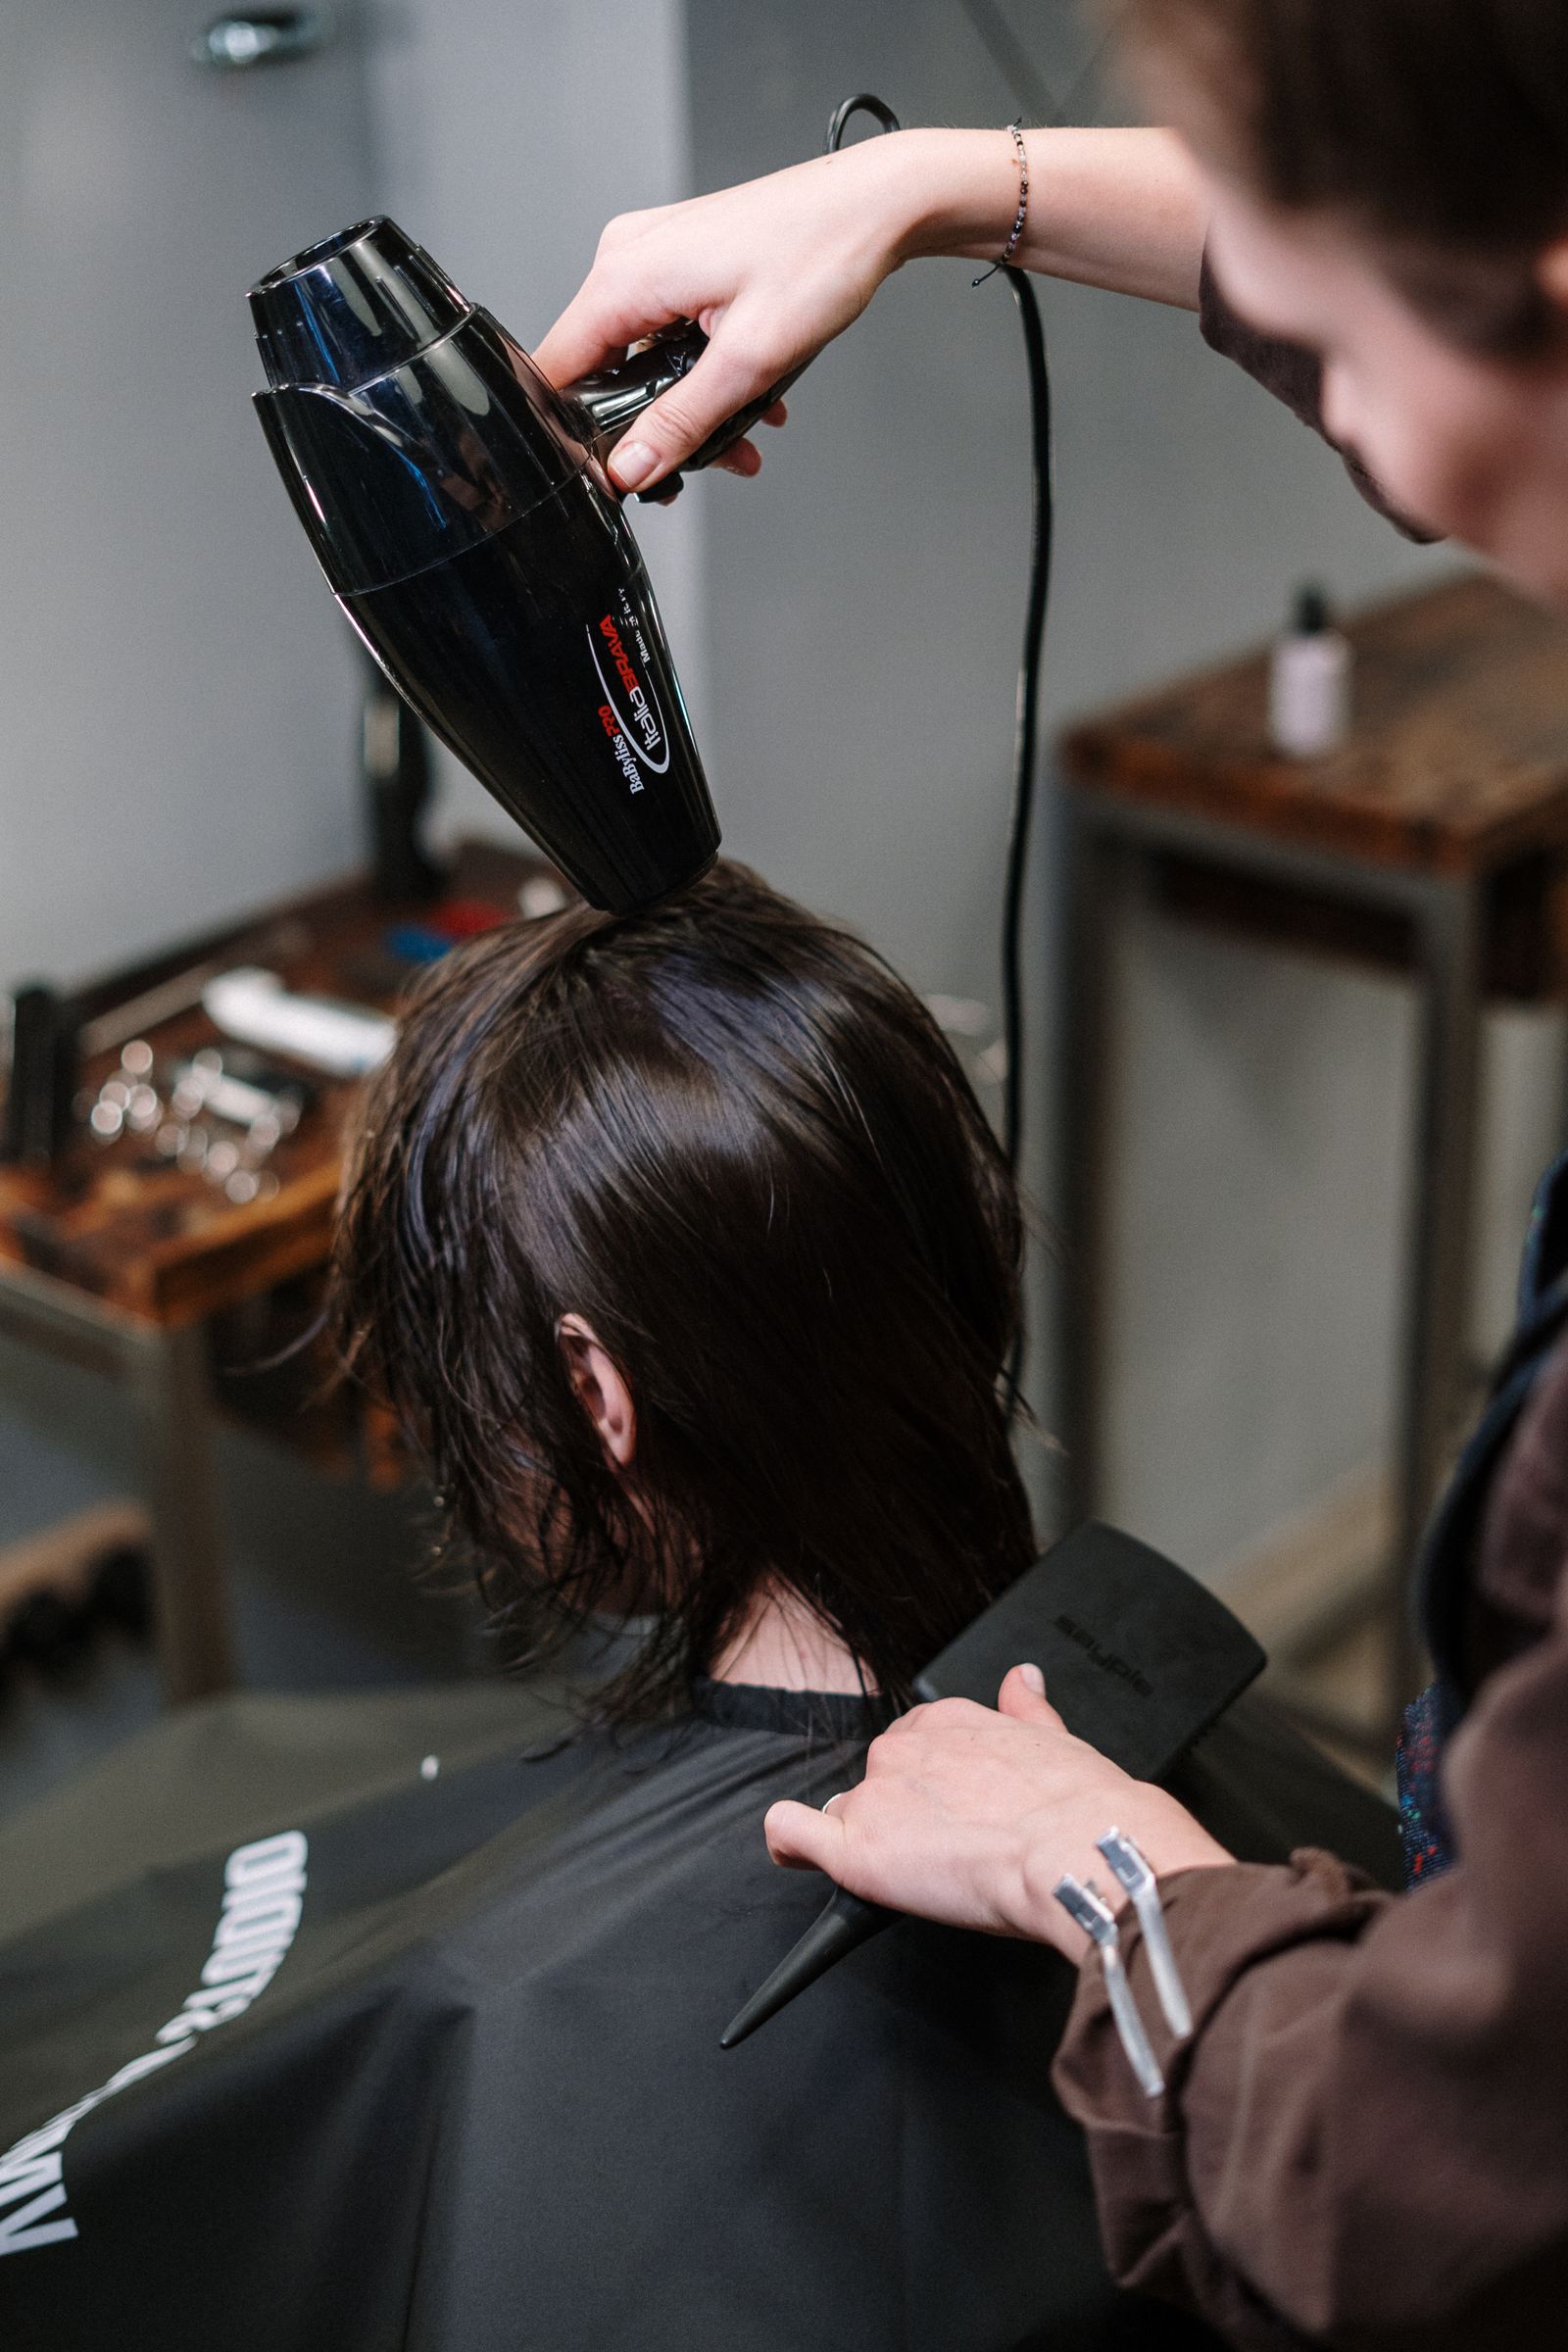

  • Revlon One-Step vs Shark FlexStyle vs Dyson Airwrap: Is 10x the Price 10x Better?

    Revlon One-Step vs Shark FlexStyle vs Dyson Airwrap: Is 10x the Price 10x Better?

    Some links on our site may earn us a commission at no extra cost to you. Learn more.

    Few product categories have a price spread as dramatic as hot air stylers. At one end sits the Revlon One-Step, the humble pink brush-dryer that became a word-of-mouth phenomenon. At the other sits the Dyson Airwrap, a styler that costs roughly ten times as much and comes packaged like consumer jewelry. In between, Shark’s FlexStyle planted its flag as the “Dyson results without the Dyson invoice” option. The obvious question — is ten times the price ten times better? — has an equally obvious answer: no. The useful question is where each tier of spending stops paying you back.

    These three tools overlap less than they appear to. The Revlon is a dryer-brush: one shape, one job, done well. The FlexStyle and Airwrap are modular systems that dry, curl, smooth, and volumize with swappable attachments. Comparing them is really comparing three philosophies: cheap and cheerful, versatile and sensible, and premium and engineered.

    Quick answer: the Shark FlexStyle is the best buy for most people, the Revlon One-Step remains an outstanding budget tool if a smooth blowout is all you want, and the Dyson Airwrap is a genuine upgrade only for people who style frequently and care about gentler heat.

    Our verdict at a glance

    • Best overall: Shark FlexStyle — most of the Airwrap experience at a mid-tier price
    • Best budget: Revlon One-Step — the fastest route to a salon-style blowout for the least money
    • Best upgrade: Dyson Airwrap — the most refined engineering and the gentlest styling, at a serious premium
    • Best for fine or damage-prone hair: Dyson Airwrap, thanks to tight heat control

    How the three stylers compare

    AttributeRevlon One-StepShark FlexStyleDyson Airwrap
    Price tier$$$$$$
    What it isSingle-purpose dryer brushModular multi-stylerModular multi-styler
    Heat approachRuns hot, basic settingsModerate heat, several settingsTightly regulated, lower-heat styling
    VersatilityBlowouts onlyDry, curl, smooth, volumizeDry, curl, smooth, volumize
    Learning curveAlmost noneModerateModerate to steep
    Best forQuick everyday blowoutsVersatility on a sane budgetFrequent stylers prioritizing hair health

    Revlon One-Step: the budget legend

    The One-Step earned its cult status honestly. It solves a specific problem — drying and smoothing hair in a single pass — better per dollar than anything else in the category. The oval brush shape lifts roots and turns ends under as you go, so people who never mastered the round-brush-plus-dryer juggling act get a convincing blowout on the first try. There is no learning curve worth mentioning, and replacing it costs so little that owners treat it as a consumable rather than an investment.

    Its weaknesses are the flip side of its price. It runs hot with relatively coarse control, so using it daily on high is a genuine styling-damage concern over time, especially on fine or already-processed hair. It is bulky near the face, awkward at the nape of the neck, and does exactly one style. The most common complaint from long-term owners is durability — these tools tend to be loved hard and retired within a few years rather than passed down.

    Buy it if a smooth, voluminous blowout is your one and only goal and you want to spend as little as possible getting it. Skip it if you want curls, waves, or careful heat management — that’s not this tool’s job.

    Shark FlexStyle: the value sweet spot

    The FlexStyle exists because Shark looked at the Airwrap’s core trick — air-powered curling and drying with swappable heads — and asked how much of it could be delivered at a fraction of the cost. The answer turned out to be: most of it. The FlexStyle dries quickly, its curling attachments genuinely wrap hair with airflow, and its party trick — a wand that pivots between straight dryer and right-angle styler — is legitimately useful rather than gimmicky. For a wide range of hair types, the finished results are hard to tell apart from the premium option across a dinner table.

    The honest drawbacks: the FlexStyle is louder than you’d like, its heat control is less refined than Dyson’s, and curls tend to need a bit more heat and a bit more repetition to set, which partially erodes the gentle-styling advantage of air-based tools. Attachment swapping is functional but less slick, and owners consistently report the accessories feel a tier below the main unit in build quality. None of these are dealbreakers; all of them are noticeable.

    Buy it if you want one tool that dries and styles multiple ways without a painful outlay — this is the rational choice for most people. Skip it if you’re highly noise-sensitive, or if you style daily and the long-term heat refinement of the premium option matters to you.

    Dyson Airwrap: the engineered indulgence

    Strip away the packaging theater and the Airwrap still has real engineering under it. Its motor is small, fast, and quiet for the power delivered; its heat regulation measures and adjusts constantly, keeping styling temperatures meaningfully lower than traditional hot tools; and its curling barrels use airflow to wrap hair on its own, which never stops feeling slightly magical. For people who style several times a week, the cumulative gentleness is the strongest genuine argument for the price — hair simply endures less abuse per style.

    Now the honest part. The Airwrap has a real learning curve — expect a frustrating first week and a technique-tutorial rabbit hole. Curls from any air styler, Dyson included, are softer and shorter-lived than iron-made curls, and owners with thick, coarse, or very long hair consistently report needing more passes and more patience. And the value math is unavoidable: it costs several times the FlexStyle for results that are better at the margins, not transformationally better. You are paying for refinement, hair-health headroom, and, yes, some brand pleasure.

    Buy it if you style frequently, prioritize minimizing heat exposure, and the price doesn’t distort your budget. Skip it if you style occasionally — the cost per use will never justify itself — or if you expect iron-crisp, all-day curls.

    Which styler fits your hair type

    Fine or thin hair is where the Airwrap’s case is strongest and the Revlon’s is weakest. Fine strands show heat damage first and lose volume fastest, so the Airwrap’s regulated, lower-temperature styling and root-lifting attachments genuinely earn their keep — while the Revlon’s hotter, blunter approach asks fragile hair to absorb more punishment per blowout. If you’re fine-haired and budget-bound, the FlexStyle on its lower heat settings is the sensible middle path, and a longer drying pass beats a hotter one every time.

    Thick and coarse hair flips the script. Owners with dense hair consistently report that air stylers of every price struggle to set lasting curls in heavy strands, and that drying takes longer than any promotional video implies. Here the Revlon’s raw heat is actually an asset for smoothing, and the gap between FlexStyle and Airwrap results narrows to nearly nothing — which makes the cheaper multi-styler the rational pick if you want versatility, or the Revlon if you mostly want sleekness.

    Wavy and curly textures should think attachment-first rather than brand-first. A good diffuser and a smoothing brush cover most curly routines, and both modular systems offer them; the deciding factors become drying power, noise tolerance, and price. The Revlon, being a smoothing brush by design, is really only relevant to curly-haired buyers who regularly want a straight or blown-out look rather than defined curls.

    Cost of ownership, honestly

    Sticker price is only the opening bid. The Revlon’s math is simple: it costs little, it lasts a few years of regular use, and replacing it is painless — even two or three replacements over a decade leave it the cheapest option by a wide margin. The modular systems carry quieter costs: additional attachments sold separately, the temptation of new-generation upgrades, and in Dyson’s case a resale-and-refurbish market that softens the blow but rarely erases it. The FlexStyle’s mid-tier price buys most of the modular benefit while keeping the sunk cost survivable if styling turns out to be a phase rather than a habit — one more reason it’s our default recommendation.

    How we compared

    We compared these stylers on the factors that decide real-world satisfaction: finished results across hair types, heat behavior and its implications for long-term hair condition, versatility per dollar, ergonomics and noise, learning curve, and durability sentiment from long-term owners. We prioritized recurring patterns in owner experience over launch-week enthusiasm, and we ignored spec-sheet numbers that don’t survive contact with an actual morning routine. Pricing is expressed in tiers because street prices move constantly; relative positioning is what stays true. Browse the rest of our beauty and grooming comparisons for more of this approach.

    Frequently asked questions

    Is the Dyson Airwrap really worth ten times the Revlon?

    Not in a linear sense. Diminishing returns hit hard in this category. The Airwrap is better — quieter, gentler, more versatile — but it is perhaps twice as good in daily experience, not ten times. Whether that premium is “worth it” depends entirely on how often you style and how much the outlay matters to you.

    Will any of these work on curly or coily hair?

    All three can, with caveats. The Revlon is mainly a straightening-and-smoothing tool. The FlexStyle and Airwrap both offer diffuser and smoothing attachments, and both brands sell configurations aimed at curlier textures. Owners with dense or coily hair consistently report that drying takes longer than marketing suggests, whichever tool they choose.

    Do air stylers damage hair less than flat irons and curling irons?

    Generally yes, because they style at lower temperatures than direct-contact hot plates. The trade-off is hold: air-set styles are softer and drop faster, especially in humidity. Gentler styling and longer-lasting styling pull in opposite directions, and no tool has fully solved that.

    Should I wait for the newest version before buying?

    Only if you’re set on the premium tier, where new generations bring meaningful attachment and airflow improvements and older versions get discounted. At the budget end, revisions are minor — the Revlon you buy today does what it did years ago, which is exactly why people love it.

    What else should I budget for?

    A heat protectant spray is cheap insurance with any of these, and a good brush helps every result. Beyond that, budget a little patience: every tool here rewards a couple of weeks of technique practice more than any accessory purchase. If you’re building out a whole grooming kit, our Sonicare vs Oral-B comparison applies the same value lens to electric toothbrushes, and our gentle cleanser matchup covers the skincare side of the routine.

    Bottom line

    Ten times the price buys you refinement, not a revolution. The Revlon One-Step remains one of the best value purchases in all of personal care if a blowout is your whole wishlist. The Shark FlexStyle is the smart default — genuinely versatile, genuinely good, priced like a tool rather than a trophy. The Dyson Airwrap is the best of the three and the hardest to justify: choose it because you style often and value gentle heat, not because the price implies proportional performance. Spend to the tier that matches your routine, and no tier will disappoint you.

  • FURminator vs Slicker Brush vs Grooming Glove: Deshedding Tools Head-to-Head

    FURminator vs Slicker Brush vs Grooming Glove: Deshedding Tools Head-to-Head

    Some links on our site may earn us a commission at no extra cost to you. Learn more.

    Every owner of a shedding pet eventually reaches the same breaking point: the lint roller lives by the door, the couch has a permanent fur topcoat, and the vacuum is fighting a war it cannot win. The grooming aisle offers three very different weapons. The FURminator — a deshedding tool with a fine-toothed metal edge that reaches past the topcoat to pull out loose undercoat. The slicker brush — the classic pad of fine bent wires that detangles, fluffs, and lifts loose hair from the coat’s surface and middle layers. And the grooming glove — rubber-tipped mitts that turn petting into passive fur collection for animals who flee at the sight of an actual brush.

    They are not interchangeable, and that is where money gets wasted. A FURminator on a single-coated breed can thin a coat that never needed deshedding; a slicker alone will barely dent a Husky’s undercoat in blowing season; a glove will not detangle anything. The right tool depends on your pet’s coat type and — just as much — on your pet’s tolerance for being groomed at all.

    Quick answer: for double-coated, heavy-shedding breeds the FURminator (or a comparable undercoat deshedding tool) removes the most fur per session; the slicker brush is the better everyday all-rounder for most coats; and the grooming glove is the gateway tool for brush-hating pets — many households genuinely need two of the three.

    Our verdict at a glance

    • Best overall: Slicker brush — the most versatile single tool across coat types and the everyday maintenance champion
    • Best budget: Grooming glove — cheap, gentle, and the only tool some pets will tolerate
    • Best upgrade: FURminator — unmatched undercoat removal for double-coated shedders, used correctly and sparingly
    • Best for nervous pets: Grooming glove — it reads as affection, not equipment

    Head-to-head comparison

    AttributeFURminatorSlicker brushGrooming glove
    Loose-fur removal (double coats)ExcellentGoodFair
    Detangling abilityNone — coat must be tangle-free firstVery goodNone
    Gentleness / overuse riskLowest margin for errorModerate — technique mattersMost forgiving
    Pet acceptanceMixedGenerally goodBest of the three
    Coat types servedDouble and heavy-shedding coatsMost medium and long coatsShort and smooth coats, nervous pets
    Price tier$$$$$$

    FURminator: the undercoat heavy artillery

    Where it wins: sheer extraction. Nothing else in this comparison touches a proper deshedding tool during a double-coated breed’s seasonal blow. The FURminator’s closely spaced metal teeth slide through the topcoat and catch the soft, loose undercoat beneath — the fur that actually ends up on your furniture — and the first session on a German Shepherd, Husky, or heavily shedding cat produces a pile of fur that has to be seen to be believed. The FURejector button that pops collected fur off the blade is a small but genuinely useful touch, and the tool comes in sizes and short/long-hair versions that meaningfully change performance, so matching the model to your pet matters.

    Honest drawbacks: this is the easiest tool here to misuse. Pressed too hard, used too often, or dragged over the same spot repeatedly, a deshedding edge can thin a healthy coat, irritate skin, and cut topcoat guard hairs rather than just lifting dead undercoat — the most common complaint from disappointed buyers is coat damage or a pet that grew to hate the tool. It is flatly the wrong tool for single-coated breeds (Poodles, many terriers, Greyhound-type smooth coats) and must never be used over tangles or mats, which it will yank painfully. It is also the most expensive tool of the three, and budget lookalikes vary widely in edge quality. Keep sessions short, keep pressure light, and if your pet’s skin looks pink afterward, you are overdoing it — persistent skin issues or bald patches are a vet conversation, not a grooming problem.

    Who should buy it: owners of double-coated, heavy-shedding dogs and cats who already keep the coat tangle-free and want to win shedding season. Who should skip it: single-coated and curly-coated breeds, matted coats, thin-skinned or grooming-averse pets, and anyone unwilling to learn light-handed technique.

    Slicker brush: the everyday all-rounder

    Where it wins: versatility. The slicker’s fine bent-wire pins do three jobs in one pass — lift loose surface and mid-coat hair, tease apart small tangles before they become mats, and leave the coat fluffed and tidy. That makes it the default recommendation for the widest range of coats: medium and long coats, silky coats, wavy coats, and double coats between seasonal blows. Used a few times a week, a slicker prevents the matting that makes every other grooming job harder, which is why professional groomers reach for one constantly. Self-cleaning versions — a button retracts the pins so collected fur lifts away — remove the category’s traditional annoyance, and good ones cost far less than a FURminator.

    Honest drawbacks: technique is the hidden variable. Those wire pins scratch skin if pressed hard or scrubbed in place — the classic “slicker burn” — so the correct motion is light, short strokes with the wrist, not arm pressure. A slicker cannot reach deep undercoat on a blowing double coat, which is precisely the FURminator’s territory, and on very short smooth coats there is little for it to do. Cheap slickers with sharp, unpolished pin tips are a false economy; owners consistently report that pin quality is what separates a brush pets tolerate from one they dodge.

    Who should buy it: nearly every owner of a medium- or long-coated pet — if you own one grooming tool, this is the one. Who should skip it: owners of very short-coated pets (the glove serves them better) and pets whose undercoat blowouts are the entire problem (pair it with a deshedding tool instead).

    Grooming glove: the diplomat

    Where it wins: acceptance. A grooming glove does not look, sound, or feel like grooming — it feels like being petted, which is why it succeeds with the cats who vanish at the sight of a brush and the dogs who treat brushes as chew toys. The rubber nubs generate light friction that pulls loose surface hair free and collects it in satisfying sheets you peel off afterward. It excels on short and smooth coats where there is no undercoat to chase, doubles as a bath-time scrubber for lathering shampoo, gives a pleasant massage that many pets actively solicit, and costs the least of the three. As a first grooming experience for a kitten, puppy, or nervous rescue, nothing else is as low-stakes.

    Honest drawbacks: modest capability, honestly stated. A glove removes only loose surface hair — it does not detangle, cannot prevent or address mats, and barely dents a true undercoat blow. On long or dense coats it mostly polishes the surface while the real shedding continues below. Fit matters more than buyers expect (a loose glove just slides), the nubs wear smooth with heavy use, and hair eventually works into the fabric backing. The most common complaint is simply disappointment from owners who expected deshedding-tool results from a petting mitt.

    Who should buy it: owners of short-coated dogs and cats, brush-averse or anxious pets, and anyone who wants a zero-drama daily fur habit. Who should skip it: owners of long, dense, or mat-prone coats hoping for a one-tool solution — the glove is a supplement there, not a strategy.

    How we compared

    We judged the three tool types on the criteria that decide whether a grooming tool earns a permanent spot or a junk-drawer burial: how much loose fur each removes on the coat types it claims to serve, detangling and mat-prevention ability, gentleness and the margin for user error, pet acceptance — the factor owners most often underestimate — and price tier. Our assessments come from how each tool works mechanically, the usage guidance manufacturers themselves publish, and the experiences owners and groomers report most consistently, rather than from any single dramatic before-and-after. Two principles ran through every verdict: the best tool is the one your pet will actually sit for, and no brush replaces veterinary attention when shedding is sudden, patchy, or paired with irritated skin.

    Frequently asked questions

    How often should I use a FURminator?

    Less than you think. For most double-coated pets, one or two short sessions a week is plenty, stepping up modestly during seasonal coat blows. Daily deshedding is a recipe for irritated skin and a thinned coat. In between, a slicker or glove handles maintenance without touching the undercoat’s healthy portion.

    Can I use these tools on both my dog and my cat?

    The tool types work for both species, but sizing and gentleness matter: cat skin is thinner and looser than dog skin, so use lighter pressure, shorter sessions, and cat-sized versions where offered. Many multi-pet homes keep one glove for the cat and a slicker or deshedding tool sized for the dog. Sharing tools between healthy pets is generally fine; wash tools between animals if one has any skin issue, and see your vet about the skin issue itself.

    My pet hates being brushed. Where do I start?

    Start with the glove, short sessions, and treats — let the animal decide grooming is a form of attention rather than an ambush. Once the glove is routine, introduce a soft slicker on the easy areas (back and sides, not belly or tail) for a few strokes at a time. Forcing a full session on a resistant pet teaches exactly the wrong lesson and makes every future session harder.

    Will regular grooming actually reduce hair on my furniture?

    Yes, with realistic expectations: grooming does not reduce how much hair a pet sheds, it changes where the hair ends up — in your tool instead of on your couch. Owners who groom a few times weekly consistently report visibly less ambient fur. Shedding that suddenly increases, comes out in patches, or leaves bare skin is a health signal, not a housekeeping problem — that is your vet’s territory.

    Do I need more than one of these tools?

    Often, yes — and that is not upselling, it is coat mechanics. A double-coated dog is best served by a slicker for routine work plus a deshedding tool for blow season. A short-coated cat may need only a glove. The pairing to avoid is buying only the FURminator and using it for everything; that is how coats get overworked. Think of the slicker as the daily driver and the other two as specialists.

    Bottom line

    Match the tool to the coat and the temperament, in that order. The slicker brush is the best single tool for the most households — versatile, affordable, and effective at the daily maintenance that prevents bigger problems. Add the FURminator if you live with a double-coated shedding machine and commit to using it lightly and occasionally; it is the upgrade that finally wins shedding season. Reach for the grooming glove when the pet, not the coat, is the obstacle — or as the cheap, pleasant daily habit for short-coated animals. Groom regularly, keep sessions positive, and let your vet weigh in whenever skin or shedding changes rather than just shedding more. While you are outfitting the grooming station, your heavy chewer may also appreciate our tough chew toy head-to-head, hydration-minded owners should see our pet fountain material comparison, and the rest of our pet head-to-heads live in the pets category.

  • Pet Water Fountains Compared: Stainless vs Ceramic vs Plastic

    Pet Water Fountains Compared: Stainless vs Ceramic vs Plastic

    Some links on our site may earn us a commission at no extra cost to you. Learn more.

    A pet water fountain sounds like a solved problem: a pump, a filter, a bowl, moving water. Yet spend five minutes reading owner experiences and you will find the same argument repeating everywhere — not about pumps or filters, but about what the fountain is made of. Stainless steel, ceramic, and plastic fountains all circulate water the same basic way, but they age completely differently, clean completely differently, and carry different implications for a surprisingly common problem: feline chin acne and skin irritation that many owners trace to scratched plastic drinking surfaces.

    The stakes are higher than they look, because a fountain’s whole purpose is to make your pet drink more — hydration is one of the quiet pillars of urinary and kidney health, especially for cats. A fountain that grows slimy because it is miserable to clean, or that your pet stops trusting because the water tastes off, quietly defeats the point. Material is the single biggest factor in whether a fountain stays clean, stays attractive to your pet, and stays in service past its first year.

    Quick answer: stainless steel is the best material for most households because it resists bacteria-harboring scratches and survives daily life; ceramic is the stylish, stable upgrade for careful homes; plastic is the budget entry point that costs you in scrubbing time and replacement cycles.

    Our verdict at a glance

    • Best overall: Stainless steel — hygienic, durable, dishwasher-friendly, and worth the modest premium
    • Best budget: Plastic — the cheapest way to find out whether your pet likes moving water at all
    • Best upgrade: Ceramic — heavy, handsome, and easy on sensitive chins, if you treat it gently
    • Best for multi-pet homes: Stainless steel in a high-capacity design — hygiene matters most when many mouths share one water source

    Head-to-head comparison

    AttributeStainless steelCeramicPlastic
    Hygiene (scratch and slime resistance)ExcellentExcellent while glaze is intactFair — scratches harbor buildup
    DurabilityExcellent — dent it, maybe; break it, noPoor to fair — chips and cracksGood against drops, poor against wear
    Ease of cleaningExcellent, usually dishwasher-safeVery good, but heavy to handleGood when new, worsens with age
    Weight / tip resistanceModerateExcellent — stays putPoor — light and slideable
    Skin-sensitivity friendlinessVery goodVery goodWeakest of the three
    Price tier$$$$$$

    Stainless steel fountains: the hygienic workhorse

    Where it wins: longevity and cleanliness, the two things that actually decide whether a fountain stays in use. Stainless steel does not develop the micro-scratches that give biofilm — that slippery pink-orange film every fountain owner eventually meets — a place to anchor. Wipe-downs genuinely work, most stainless basins tolerate the dishwasher, and the material shrugs off drops, chews, and years of daily washing that would retire a plastic unit. It is also the material of choice for pets with chin acne or skin sensitivities, a problem owners and vets alike commonly associate with scratched plastic bowls. Many well-designed units pair a stainless basin with a discreet plastic pump housing, which preserves most of the hygiene benefit where it matters: the surfaces your pet drinks from.

    Honest drawbacks: stainless costs more than plastic, and cheap thin-gauge units can feel tinny, slide on hard floors, and amplify pump hum into a faint resonance that sensitive owners notice at night. Water spots and mineral scale show more visibly on steel, so hard-water homes will still be descaling periodically. And design variety is narrower — if you want a fountain that looks like decor rather than equipment, ceramic wins the beauty contest.

    Who should buy it: nearly everyone — especially multi-pet households, owners of cats with chin acne, and anyone who has already thrown away a slimy plastic fountain. Who should skip it: strict budget shoppers testing the fountain concept for the first time, and households where the fountain’s appearance genuinely matters more than its upkeep.

    Ceramic fountains: the premium homebody

    Where it wins: stability, looks, and drinking comfort. A glazed ceramic fountain is the only option here that reads as furniture rather than pet gear, and its weight is a hidden feature — it will not slide across the kitchen floor or tip when a large dog leans into it. The glazed surface is as smooth and hygienic as steel while the glaze is intact, equally kind to sensitive skin, and pleasantly neutral in taste; some pets that snub metal bowls drink happily from ceramic. The mass also damps pump vibration, making well-built ceramic units among the quietest running.

    Honest drawbacks: fragility defines this category. Drop a piece during a sink cleaning and you are shopping again; chip the glaze and the exposed porous ceramic underneath becomes exactly the bacteria refuge you were trying to avoid — a chipped ceramic fountain should be retired, not tolerated. The weight that grants stability makes weekly disassembly-and-wash sessions genuinely awkward, and owners consistently report that cleaning effort is the reason ceramic fountains end up unplugged in a cabinet. Add the highest price tier of the three and less capacity variety, and this becomes a considered purchase rather than a default.

    Who should buy it: single-pet or calm households that will clean carefully, style-conscious owners, and homes with skittish pets that appreciate a silent, stable water source. Who should skip it: households with boisterous dogs or countertop-clearing cats, anyone with limited hand strength for handling heavy wet ceramic, and buyers who want a set-and-forget workhorse.

    Plastic fountains: the honest entry point

    Where it wins: price, weight, and variety. Plastic is where fountain makers experiment, so this tier offers the most shapes, sizes, colors, and capacities, usually at the lowest cost. If you are not sure your pet will even acknowledge a fountain — a real possibility, since some cats regard new appliances as suspicious intruders — a plastic unit is the cheapest way to run the experiment. The light weight makes carrying it to the sink trivial, and reputable models use food-safe, BPA-free plastics.

    Honest drawbacks: plastic’s problems arrive on a schedule. Every wash and every scrape of a claw leaves micro-scratches, and those scratches are where slime takes hold — which is why the most common trajectory owners describe is a fountain that was easy to clean for the first months and then never feels truly clean again. Scratched plastic against a cat’s chin is also the classic suspect in feline chin acne, and some pets simply dislike the faint taste plastic can impart to standing water. Light weight cuts both ways: enthusiastic drinkers can slide the unit around, and determined chewers can damage it outright. Expect to replace a heavily used plastic fountain rather than retire it on your own terms.

    Who should buy it: first-time fountain buyers testing acceptance, budget-limited households ready to scrub on schedule, and anyone needing an odd size or shape only made in plastic. Who should skip it: owners of cats with chin acne or skin sensitivity, multi-pet homes where hygiene load is high, and anyone who already knows they hate scrubbing.

    How we compared

    We compared the three fountain materials on the factors that determine real-world success: hygiene as the unit ages (scratch resistance and biofilm behavior), durability against drops and daily washing, cleaning effort — the number-one reason fountains get abandoned — stability, noise, pet acceptance, skin-sensitivity considerations, and price tier. Because pumps, filters, and capacities vary by model rather than material, we held those aside and judged the materials on how they behave by design and on the patterns owners report most consistently across brands. We avoid exact prices, which change constantly, in favor of relative tiers. One constant across all three: any fountain only helps if it is kept clean and filled, and any sudden change in your pet’s drinking habits is a conversation for your vet, not a shopping decision.

    Frequently asked questions

    Do pet fountains actually make pets drink more?

    Many pets — cats especially — show a clear preference for moving water, and owners commonly report increased drinking after switching from a static bowl. It is not universal: some pets are indifferent and a few are wary of the pump noise. That uncertainty is exactly why a budget plastic unit is a reasonable first experiment before investing in steel or ceramic. If you have hydration concerns about your pet, raise them with your vet regardless of what the water sits in.

    How often should I clean a pet fountain?

    A practical rhythm: top up water every day or two, rinse the basin and wipe surfaces every few days, and fully disassemble — pump included — for a thorough wash weekly, with filter changes on the maker’s schedule. Stainless and intact-glaze ceramic reward this routine with surfaces that come genuinely clean; aging plastic demands more scrubbing for a worse result.

    What is the slimy film that builds up in fountains?

    Biofilm — colonies of bacteria that anchor to surfaces in standing water. Every fountain develops it eventually, but scratched plastic gives it the most footholds, which is the core hygiene argument for stainless or glazed ceramic. Regular full washes, not just top-ups, are the counter-measure regardless of material.

    Can a fountain help with feline chin acne?

    Switching a cat with chin acne from scratched plastic to stainless steel or ceramic drinking surfaces is one of the most common first steps owners try, and many report improvement. It is not a guaranteed fix — chin acne has multiple possible causes — so persistent or worsening irritation belongs in front of your vet rather than being managed by shopping alone.

    Are fountains worth it for dogs, or just cats?

    Dogs benefit too, particularly enthusiastic drinkers and multi-dog homes where a bowl empties fast — high-capacity stainless designs suit them best, and the material shrugs off the rougher treatment dogs deal out. If your dog is harder on equipment than on water bowls, our tough chew toy comparison is probably the more urgent read.

    Bottom line

    Buy stainless steel unless you have a specific reason not to. It is the material that stays hygienic as it ages, survives the dishwasher and the dog, and costs only moderately more than plastic — the closest thing this category has to a default right answer. Choose ceramic when stability, silence, and looks justify the premium and you trust your household not to chip it. Use plastic the way it deserves to be used: as an inexpensive experiment to confirm your pet likes moving water, replaced with something better once the answer is yes. Hydration is one of the cheapest health wins available to a pet owner — pair it with the right litter setup from our cat litter comparison, and find the rest of our head-to-heads in the pets category.

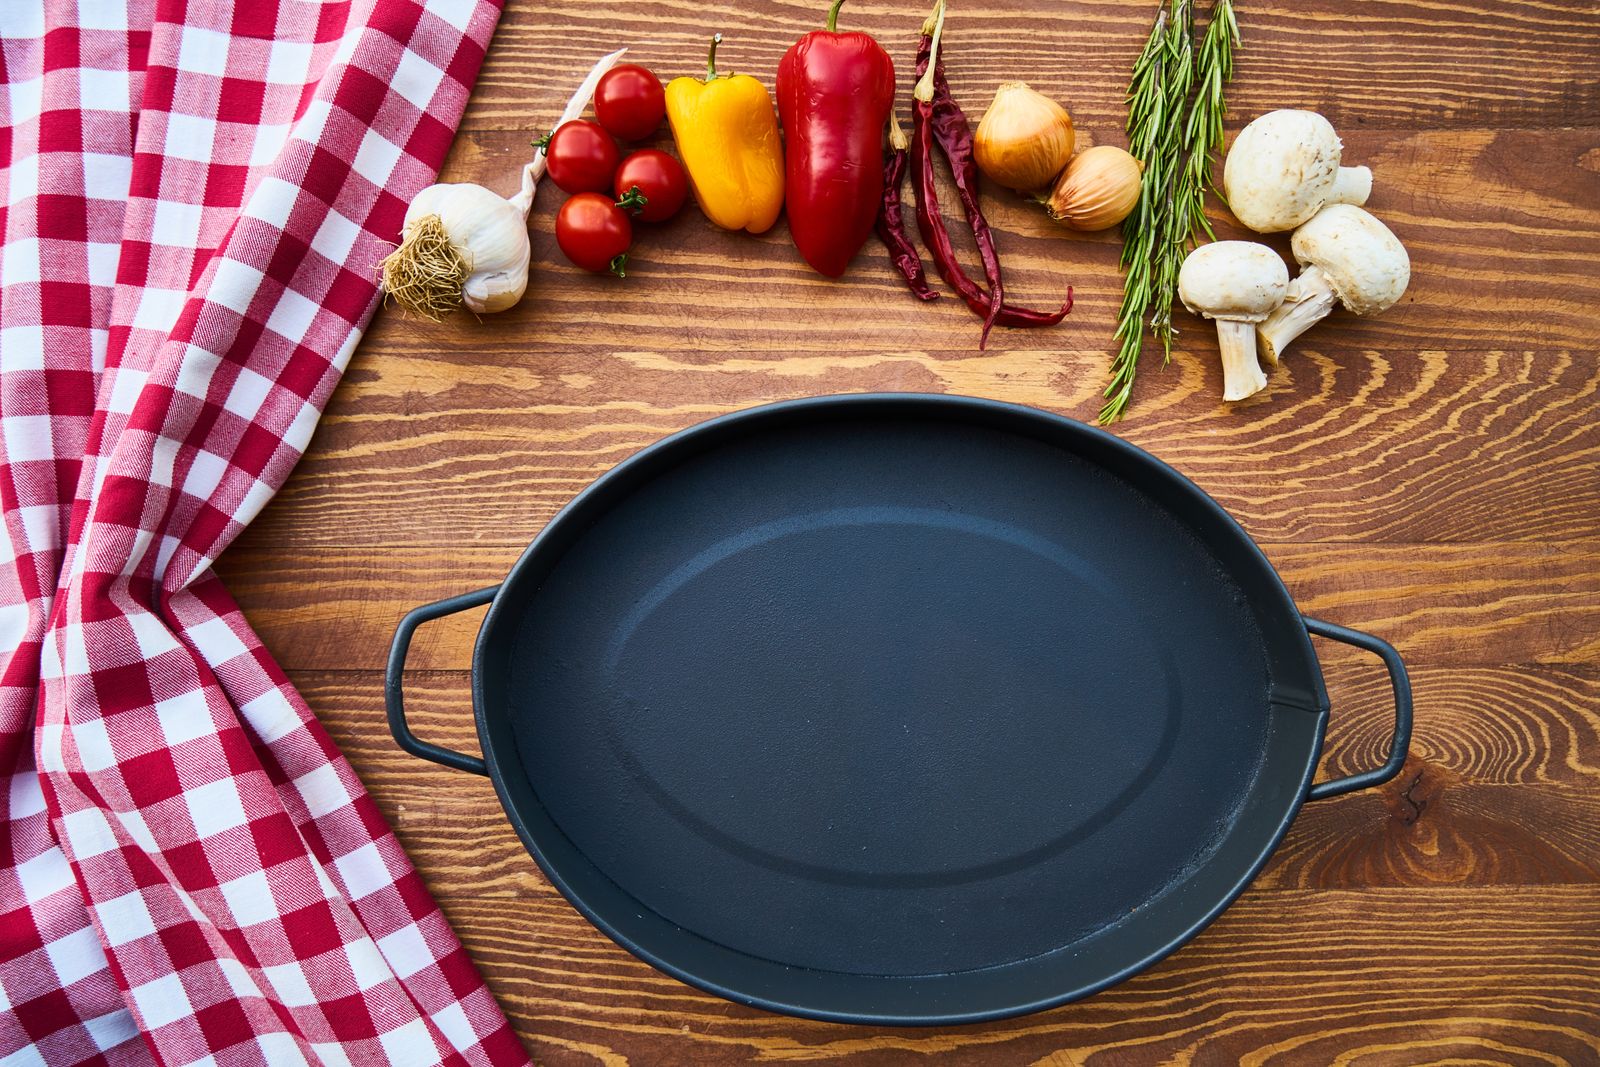
  • Cast Iron vs Carbon Steel vs Stainless Steel: The Only Skillet Comparison You Need

    Cast Iron vs Carbon Steel vs Stainless Steel: The Only Skillet Comparison You Need

    Some links on our site may earn us a commission at no extra cost to you. Learn more.

    Ask five serious home cooks which skillet you should buy first and you will get five confident, contradictory answers. Cast iron devotees will tell you their pan will outlive your grandchildren. Carbon steel converts insist it does everything cast iron does at half the weight. Stainless steel loyalists will point out, correctly, that it is what most restaurant kitchens actually use. All three camps are right about their favorite pan’s strengths — and conveniently quiet about its weaknesses.

    The confusion exists because these three materials are genuinely good at different jobs. One holds heat like a bank vault, one moves like a chef’s tool, and one tells you exactly what your food is doing because nothing sticks to a lie in stainless steel. The right pick depends on what you cook most, how much maintenance you will honestly perform, and whether pan weight matters to your wrists.

    Quick answer: carbon steel is the best single skillet for most cooks who want one do-it-all pan; cast iron is the unbeatable budget pick for searing, baking, and outdoor cooking; and stainless steel is the low-maintenance workhorse for sauces, acidic foods, and anyone who refuses to babysit a pan. For more head-to-head kitchen verdicts, browse our full Kitchen & Cooking category.

    Our verdict at a glance

    • Best overall: Carbon steel — cast iron’s cooking chops with a fraction of the weight
    • Best budget: Cast iron — decades of service for the price of a nice dinner
    • Best upgrade: Fully clad stainless steel — buy once, ignore maintenance forever
    • Best for high-heat searing: Cast iron — nothing holds a scorching temperature like it

    How the three materials compare

    AttributeCast ironCarbon steelStainless steel
    Price tier$$$$$–$$$
    WeightHeavyModerateModerate
    Heat retentionExcellentGoodGood (clad)
    Responsiveness to heat changesSlowFastFast
    Maintenance requiredSeasoning upkeepSeasoning upkeepEssentially none
    Acidic foods (tomato, wine, citrus)PoorPoorExcellent

    Two clarifications on that table before we go deeper. First, “maintenance” for the iron pans is measured in seconds per wash, not hours per month — it is a habit, not a hobby, and we will demystify it below. Second, the stainless price spread reflects construction quality: disc-bottom pans are cheap but heat unevenly, while fully clad pans cost more and are the only version we would actually recommend. With cast iron and carbon steel, by contrast, the affordable options and the boutique ones cook far more alike than their price gap suggests, because the material itself is doing most of the work.

    Cast iron: the immortal heavyweight

    Cast iron’s pitch has not changed in a century because it has not needed to. The pan is thick, dense, and nearly indestructible, and that mass is its superpower: once a cast iron skillet is properly heated, dropping in a cold steak barely dents its temperature. The result is the deep, edge-to-edge crust that people chase with every other pan and rarely achieve. It also moves seamlessly from stovetop to oven to campfire, bakes cornbread and deep-dish anything beautifully, and develops an increasingly slick seasoned surface the more you cook fat-friendly foods in it.

    The value is almost unfair. A bare cast iron skillet sits at the bottom of the price range in this comparison, yet with minimal care it will outlast every other pan in your kitchen — flea markets are full of fifty-year-old skillets that need nothing more than a cleanup to return to service. There is no coating to wear out and nothing to break.

    The honest drawbacks start with weight: a mid-size skillet is heavy enough that tossing vegetables or pouring one-handed is a workout, and cooks with wrist issues often regret the purchase. It heats slowly and unevenly on the stovetop unless you give it a long preheat, it responds sluggishly when you need to drop the temperature fast, and its seasoning resents long-simmered acidic sauces. The maintenance is lighter than the internet suggests — dry it, oil it occasionally — but it is not zero, and the most common complaint from new owners is discovering rust after leaving the pan wet in the sink once.

    Buy it if you love searing, baking, and outdoor cooking, want maximum pan for minimum money, and do not mind the heft. Skip it if pan weight is a genuine concern, you cook lots of tomato-based or wine-based dishes, or you want a pan that tolerates neglect.

    Carbon steel: the chef’s compromise

    Carbon steel is what you get when you ask for cast iron’s virtues without its bulk. The material is nearly identical chemically, so it seasons the same way and develops the same increasingly nonstick surface — but the pans are forged thinner, so a comparable skillet weighs roughly half as much and responds to burner changes in seconds rather than minutes. This is why carbon steel, not cast iron, is the traditional choice in professional French kitchens and under every wok in East Asia: it combines high-heat searing ability with the agility to actually cook with, not just on.

    Where it wins: versatility per gram. Eggs and crepes glide on a well-seasoned surface, steaks get a proper crust, the sloped sides make flipping and tossing natural, and the pan goes from stovetop to a blazing oven without complaint. Owners consistently describe carbon steel as the pan that quietly takes over the kitchen — the one that ends up on the stove every day while the others wait in the cabinet.

    Honest drawbacks: it shares cast iron’s core weaknesses. Seasoning is required, acidic foods will strip it, and a neglected wet pan will rust. New pans arrive with a machined gray surface that looks blotchy and uneven during the first weeks of seasoning, which unnerves first-time buyers — the mottled look is normal, but the most common early complaint is food sticking before the seasoning matures. Heat retention, while good, cannot match cast iron’s for searing very thick cuts, and prices run a tier above bare cast iron for a comparable size.

    Buy it if you want one pan that handles ninety percent of dinners — eggs to steak to stir-fry — and you are willing to learn basic seasoning care. Skip it if you want zero maintenance, simmer acidic sauces regularly, or need maximum thermal mass for thick steaks above all else.

    Stainless steel: the no-excuses workhorse

    A fully clad stainless steel skillet — one with an aluminum core running through the entire pan, not just a disc on the bottom — is the least romantic and most practical pan in this comparison. It requires no seasoning, tolerates every food you can legally cook, goes in the dishwasher, and shrugs off metal utensils, scouring pads, and decades of abuse. When restaurant cooks reach for a pan a hundred times a night, this is usually the one, precisely because it never asks for anything back.

    Where it wins: everything acidic and everything saucy. Tomato sauces, wine reductions, lemon-butter pan sauces — stainless is the only material here that handles them without consequence, and the fond that builds on its surface is the foundation of better pan sauces than either seasoned pan can produce. It also browns beautifully once you learn its one rule (preheat properly, then add fat), and clad construction heats more evenly than either iron pan on an ordinary burner.

    Honest drawbacks: stainless steel is not nonstick and never will be. Eggs, delicate fish, and anything starchy demand correct preheating and enough fat, and the learning curve is real — the most common complaint from new owners is sticking that is really a technique problem wearing a cookware costume. Good fully clad pans also cost real money; the $$$ tier in this comparison belongs to the premium clad brands, and cheap disc-bottom stainless pans scorch at the edges and give the whole material a bad name.

    Buy it if you want a lifetime pan with zero maintenance, you cook sauces and acidic dishes often, or you simply refuse to think about seasoning. Skip it if your priority is easy eggs on a budget, or you are unwilling to spend a week learning heat control.

    One buying note: with stainless steel, the handle and rivets deserve a look before the finish does. You will be gripping this pan for decades, often with a towel straight out of a hot oven, and a comfortable, securely riveted handle matters more over ten years than any polish or brand prestige on the box.

    How we compared

    We compared the three materials on the dimensions that actually decide daily use: searing power, responsiveness, weight and handling, maintenance burden, compatibility with acidic foods, and long-term durability per dollar. We deliberately evaluated materials rather than individual brands, because within each category the material’s physics matter far more than the logo on the handle — a conclusion that echoes what long-term owners consistently report. Prices are expressed in tiers ($, $$, $$$) because street prices swing widely by brand and size. If you like this approach, our air fryer comparison and stand mixer face-off apply the same playbook to the countertop.

    Frequently asked questions

    Which skillet should I buy first?

    If you can own only one: carbon steel for hands-on cooks who will maintain seasoning, stainless steel for everyone else. Cast iron is a phenomenal second pan — its searing and baking strengths complement either of the other two better than it stands alone.

    Is seasoning as hard as it sounds?

    No. Day to day it amounts to drying the pan after washing and wiping it with a thin film of oil. Full re-seasoning — oiling and baking the pan — is an occasional event, not a routine. The mystique comes from enthusiasts optimizing, not from any real difficulty.

    Can I use soap on cast iron and carbon steel?

    Yes. Modern dish soap will not strip polymerized seasoning — that old warning dates from an era of lye-based soaps. What actually damages seasoning is soaking, the dishwasher, and long-simmered acid. Wash, dry promptly, oil lightly, done.

    What about nonstick pans?

    A coated nonstick pan is a consumable: brilliant for eggs on day one, degraded within a few years no matter the brand, and intolerant of high heat. The three materials in this comparison are lifetime tools. Many kitchens sensibly keep one inexpensive nonstick for eggs alongside a skillet from this trio for everything else.

    Do these work on induction stoves?

    Cast iron and carbon steel are magnetic and work superbly on induction. Most quality stainless skillets are induction-ready too, but check the specific pan — a few all-aluminum-core designs with nonmagnetic exteriors are not. Flat, unwarped bases matter more on induction than on gas.

    Bottom line

    Choose carbon steel if you want the single most versatile skillet in the kitchen and will give it thirty seconds of care after each wash. Choose cast iron if budget rules, you sear and bake often, and weight does not scare you — no pan on earth returns more per dollar. Choose stainless steel if maintenance is a dealbreaker or your cooking leans on sauces and acidity; a good clad pan is the last one you will buy and the first one restaurants trust. The quiet truth is that these materials are teammates, not rivals — most serious kitchens eventually own two of the three. Pair whichever you pick with a proper morning setup from our coffee brew method guide and the kitchen starts pulling its weight.

  • Whey vs Plant Protein: An Evidence-Minded Comparison for Everyday Lifters

    Whey vs Plant Protein: An Evidence-Minded Comparison for Everyday Lifters

    Some links on our site may earn us a commission at no extra cost to you. Learn more.

    Stand in front of the protein powder shelf and the choice looks tribal: whey on one side, a growing wall of pea, soy, rice, and blended plant proteins on the other, each camp insisting the other is either inferior or obsolete. For an everyday lifter — someone training a few times a week who wants to recover well and hit a reasonable protein target — the marketing noise vastly exceeds the practical difference. But the differences are not zero, and picking wrong for your body or your habits means a tub that sits unused after the first chalky shake.

    Before the comparison, a framing note: protein powder is a convenience food, not a requirement. Everything a shake provides can come from meals, and this article is educational, not personalized nutrition advice — anyone with allergies, digestive conditions, kidney concerns, or specific medical or dietary needs should consult a registered dietitian or physician rather than a comparison article.

    Quick answer: if you digest dairy comfortably and just want the most protein per scoop and per dollar, whey remains the default; choose a blended plant protein if dairy disagrees with you, you eat plant-based, or you simply prefer it — with sensible serving sizes, the practical difference for everyday lifters is small.

    Our verdict at a glance

    • Best overall: Whey — the most complete amino acid profile per scoop, the most protein per dollar, and the easiest to mix and drink.
    • Best budget: Basic whey concentrate — the value benchmark the entire category is measured against.
    • Best upgrade: Whey isolate — lower in lactose and gentler on many dairy-sensitive stomachs, at a higher tier.
    • Best plant-based pick: A multi-source blend (typically pea plus rice) — blending fixes the amino acid gaps of single plant sources.
    • Best for sensitive stomachs: Trial and error, honestly — some people do better on isolate, others on plant blends; bodies vary.

    How they compare

    AttributeWhey (concentrate/isolate)Plant protein (blends)
    Protein quality per scoopExcellent — complete, leucine-richGood — blends close most of the gap
    Typical protein per servingHigherSlightly lower; scoops often larger
    Digestive comfortVaries — lactose is the usual culpritVaries — some notice more fullness or bloating
    Taste and mixabilityGenerally smoother and milderImproved greatly, but often earthier and thicker
    Dietary compatibilityNot vegan; contains dairyVegan-friendly, naturally dairy-free
    Price tier$–$$$$

    Read that table as a story about defaults and exceptions. Whey wins the raw nutrition-per-scoop-per-dollar contest, which is why it is the default. Every row where plant protein competes or wins — dietary compatibility, certain digestive situations, personal ethics — is an exception that applies powerfully to some readers and not at all to others.

    Whey protein: the well-studied default

    Where it wins. Whey is the most-studied supplement in sports nutrition, and its case is straightforward: it is a complete protein, rich in leucine — the amino acid most closely tied to switching on muscle protein synthesis — and it delivers more usable protein per scoop than almost any plant option. It is also cheap relative to what it delivers; whey concentrate has been the value benchmark of this category for decades. Practically, it mixes into thin, drinkable shakes with a spoon and shaker bottle, and mild flavors make daily use easy. For a lifter whose goal is simply “hit my protein target without cooking a fourth chicken breast,” whey is the path of least resistance.

    Honest drawbacks. Dairy is the whole drawback list. Whey comes from milk, so it is off the table for vegans and a genuine problem for people with dairy allergies. For the lactose-intolerant, concentrate is the usual offender — bloating and digestive complaints are the most common negatives owners report — though whey isolate, which strips out most lactose, resolves this for many people at a higher price tier. Flavored wheys can also lean heavily on sweeteners, and the cheapest tubs sometimes pad labels with underwhelming scoop sizes, so label reading remains a life skill.

    Who should buy it. Anyone without dairy issues who wants maximum protein per dollar, lifters focused on simple post-workout convenience, and beginners who want the option with the deepest research base and the fewest variables.

    Who should skip it. Vegans and anyone with a dairy allergy, obviously; and lactose-sensitive lifters who have already tried isolate and still had trouble — at that point a plant blend usually beats forcing the issue.

    Plant protein: the fast-improving challenger

    Where it wins. The strongest case for plant protein is that it removes barriers. It is naturally dairy-free and vegan-friendly, and many people who feel bloated on whey report plant blends sit more comfortably. The quality gap has also narrowed dramatically: single sources like rice or pea have uneven amino acid profiles, but modern blends pair complementary sources so the combined profile approaches completeness, and simply taking a slightly larger serving covers much of the remaining leucine difference. The category has matured beyond its gritty reputation too — texture and flavor still trail whey on average, but the gap between a good current blend and the plant powders of a decade ago is enormous. For lifters eating mostly plants, a blend is also an efficient way to lift total daily protein without another serving of legumes.

    Honest drawbacks. Scoop for scoop, you generally get somewhat less usable protein, and the leucine content of most blends trails whey — meaningful mainly if you refuse to adjust serving size. You typically pay a moderately higher tier for that slightly lower density, so the per-gram value math usually favors whey. Taste and texture remain the most common complaints: earthier flavors and thicker, sometimes gritty shakes, with single-source powders the worst offenders. Digestion is not automatically better either; some people find certain plant proteins more bloating than dairy, which is why “try a small tub first” is the most honest advice in this entire category.

    Who should buy it. Plant-based eaters, the dairy-allergic and lactose-intolerant, people who tried whey and disliked how it sat, and anyone who simply prefers plant products — with a blend, the practical performance difference for everyday training is small.

    Who should skip it. Pure value shoppers with no dairy issues, and texture-sensitive drinkers who already know grit and thickness will end the habit — an unused tub has the worst amino acid profile of all.

    What about casein, soy, and the other options?

    The shelf holds more than two choices, and a few deserve a quick word. Casein is whey’s slower-digesting dairy sibling — it forms a thicker shake and releases amino acids more gradually, which is why it has a following as a pre-bed option, but for hitting a daily protein target it offers no magic that regular whey lacks, and it shares all of whey’s dairy limitations. Soy is the elder statesman of plant proteins: a complete amino acid profile on its own, decades of research behind it, and typically a friendly price tier, though flavor and old controversies — long since walked back by mainstream nutrition science — have dented its popularity. Egg-white and beef-derived powders exist for the dairy-free-but-not-vegan niche, and they can work, though texture and cost keep them niche.

    The practical takeaway is that these alternatives refine the two main paths rather than replace them. If dairy suits you, whey — with casein as an optional evening variant — remains the anchor. If it does not, a pea-rice blend or a soy protein covers the plant side with slightly different trade-offs in taste and completeness. None of the exotic options changes the fundamental advice: total daily protein, from products you genuinely tolerate and enjoy, beats any clever sourcing strategy you abandon by February.

    How we compared

    We compared the two categories on protein quality and density, digestive comfort, taste and mixability, dietary compatibility, and price tier — the attributes that decide whether a tub gets finished or abandoned. We lean on the broad, well-replicated findings of sports nutrition research rather than cherry-picked single studies, and where the evidence is genuinely mixed or individual (digestion especially), we say so instead of manufacturing certainty. We use price tiers because per-pound prices swing constantly with promotions and tub sizes. As with everything in our health and fitness comparisons, the goal is a decision you will not need to re-make in three months.

    Frequently asked questions

    Will I build less muscle on plant protein?

    For everyday lifters hitting a sensible daily protein target, the difference appears small to negligible — total daily protein and consistent training dominate the outcome. The scoop-level differences matter most at the margins, and taking a slightly larger serving of a quality blend narrows even those. Elite bodybuilders can sweat the details; most of us should sweat consistency.

    Do I even need protein powder?

    No — it is a convenience, not a requirement. If you comfortably reach your protein target from meals, powder adds nothing but ease. It earns its place when appetite, schedule, or cooking reality make whole-food protein hard to hit consistently.

    Is whey isolate worth the extra cost over concentrate?

    Only for a reason. If concentrate sits fine and your goals are ordinary, it is the better value. Isolate earns its higher tier if lactose bothers you, or if you want slightly more protein with less fat and carbohydrate per scoop while dieting.

    When should I drink a protein shake?

    Whenever it helps you hit your daily total — that is the honest answer. The classic post-workout window is more forgiving than old gym lore suggested; daily totals and reasonably even distribution across meals matter more than clock-watching. Many people simply use a shake at whichever meal habitually comes up short.

    Does protein powder replace the rest of recovery?

    Not remotely. Sleep, sensible programming, and easy movement do the heavy lifting; nutrition supports them. If you are building a complete home routine, our guides to adjustable dumbbells, small-space cardio equipment, and recovery tools cover the training side of the equation.

    Bottom line

    For an everyday lifter with no dairy issues, whey is still the rational default: more protein per scoop and per dollar, the deepest evidence base, and the easiest daily habit — concentrate for value, isolate if lactose is the enemy. Plant protein is no longer a compromise pick, though; a good multi-source blend with a sensible serving size supports training essentially as well for most people, and it is the clear choice for anyone avoiding dairy by necessity or preference. Pick the one you will actually drink most days, treat it as a supplement to real meals rather than a replacement for them, and if you have individual health conditions or specific dietary needs, run your plan past a registered dietitian or physician — that is one comparison no article can make for you.

  • Beach Umbrella vs Canopy vs Wind-Sail Shade: Which Survives a Breezy Afternoon

    Beach Umbrella vs Canopy vs Wind-Sail Shade: Which Survives a Breezy Afternoon

    Some links on our site may earn us a commission at no extra cost to you. Learn more.

    Every beach town has the same recurring afternoon spectacle: a gust arrives, and somewhere down the sand an umbrella tears loose and cartwheels toward the water while its owners give chase. Beach shade looks like the simplest purchase in the outdoor aisle, and it is quietly one of the most failure-prone. The classic umbrella is cheap and fast but famously flighty. The pop-up canopy shades a whole family and doubles as backyard equipment, but in wind it behaves like a box kite with legs. And the newer wind-sail shades — stretchy fabric flown from poles and sandbag anchors — were designed around the exact conditions that destroy the other two, at the cost of a learning curve.

    The right choice comes down to an honest question: what does your typical afternoon actually look like? A calm lake beach, a gusty ocean shore, and a backyard birthday party are three different problems wearing the same “shade” label.

    Quick answer: on a genuinely breezy beach, the wind-sail shade is the design most likely to still be standing at 4 p.m.; the umbrella wins for solo simplicity and calm days, and the canopy wins everywhere the ground takes stakes and the crowd is big.

    Our verdict at a glance

    • Best overall: Wind-sail shade — engineered for the breeze that defeats everything else, with generous coverage and featherweight packing
    • Best budget: Beach umbrella with a sand anchor — minimal cost, minimal bulk, entirely adequate on calm days
    • Best upgrade: A quality pop-up canopy — the most shade, the most versatility, and the natural pick for family basecamps and backyards
    • Best for backyards and parks: Canopy — on grass with proper stakes, its wind problem largely disappears

    How the three shade styles compare

    AttributeBeach umbrellaPop-up canopyWind-sail shade
    Price tier$$$–$$$$$
    Behavior in gusty windPoor — the classic runawayPoor to fair — catches gusts like a sail boxBest — flexes and spills wind by design
    Shade areaSmall — 2–3 peopleLargest — family and gearLarge — several people, moves with the sun
    Setup effortEasiest soloHardest — really a two-person jobModerate — easy after the first few tries
    Packed weight and bulkLight, slimHeavy, awkward to carry farLightest per square foot of shade
    Versatility beyond sandFair — needs somewhere to plant the poleBest — backyard, tailgate, market stallLimited — needs sand or soft ground for anchors

    The beach umbrella: cheap, fast, and flighty

    Where it wins. Simplicity is the umbrella’s whole argument, and it’s a good one. It costs the least, packs into a slim sleeve that slings over a shoulder alongside a chair, and goes from car to shade in a couple of minutes with one pair of hands. Tilting the head keeps shade where you want it as the sun moves, and on a calm morning it does everything the fancier options do. Modern refinements help more than they sound like they would: a screw-in sand auger instead of a plain spike, a vented double canopy that lets pressure escape, and a lower profile all make the difference between an umbrella that stays and one that flies.

    Honest drawbacks. Wind is the obvious one — a canopy on a single high pole is a lever begging to be pulled, and the most common umbrella story owners tell involves a sprint down the beach. Even properly anchored, gusts invert cheap ribs and work augers loose as sand dries. The shade footprint is honestly small: two adults, maybe a toddler, and by afternoon you’re shuffling chairs every half hour to follow the shadow. A loose umbrella is also the one shade failure that can genuinely hurt bystanders, which is why anchoring isn’t optional.

    Who should buy it. Solo beachgoers, couples, and anyone whose beach days are short, spontaneous, and mostly calm. Buy the sand auger with it and bury the base generously — technique is half the product.

    Who should skip it. Anyone on a shore where the afternoon sea breeze is a daily appointment, and families who need real coverage. Both are better served below.

    The pop-up canopy: maximum shade, maximum sail

    Where it wins. Nothing else here creates a basecamp. A canopy throws a large square of deep shade big enough for the whole family, the cooler, the toys, and a folding table — and it earns its keep off the sand too, covering birthday parties, tailgates, and campsite kitchens. The accordion frame needs no assembly, just extension, and the shade doesn’t migrate as the sun moves the way an umbrella’s does. If your beach day involves more than four people or your “beach gear” also works weekends in the backyard, the canopy’s versatility is unmatched, which is exactly why it pairs so naturally with the family-scale gear in our cooler comparison.

    Honest drawbacks. On a breezy beach the canopy is the most dramatic failure of the three. That big flat roof catches gusts from every direction, the straight legs give wind a frame to lift, and soft sand offers its stakes very little to hold. Owners consistently report bent frames as the first casualty — a leg buckles in a gust and never telescopes smoothly again. Weight guards against this: proper sandbags on every leg, guylines out at angles, and the roof vented or lowered. But that means hauling the heaviest, most awkward package on this list plus the anchor weight across soft sand, and setup is honestly a two-person job. On grass with real stakes, most of these problems fade; on sand they define the experience.

    Who should buy it. Families running an all-day basecamp near the car, hosts who’ll use it in the backyard a dozen times a year, and anyone at parks, fields, or campgrounds where stakes bite. As an upgrade for people who need shade at scale, it’s the clear pick.

    Who should skip it. Anyone carrying gear a long way down soft sand, and anyone on a reliably gusty shore who won’t commit to sandbagging every leg every time. An unanchored canopy on a windy beach is a matter of when, not if.

    The wind-sail shade: designed for the breeze

    Where it wins. The wind-sail flips the problem: instead of fighting the breeze with rigidity, it uses it. A stretchy canopy flown between lightweight poles and sand-filled anchor pockets flexes with each gust and spills the pressure through, so the same afternoon breeze that launches umbrellas simply makes the sail ripple. Set up properly, it’s the design most likely to survive a breezy afternoon intact — which is the entire premise of this comparison. The bonuses are real too: shade coverage rivals a small canopy at a fraction of the weight, the whole kit packs down to a bundle one person carries easily, and the open sides keep air moving underneath rather than trapping heat the way enclosed canopies can.

    Honest drawbacks. It has a learning curve, and the first setup in a stiff breeze can be humbling — orientation relative to the wind matters, and the anchors want a genuinely generous fill of sand. Counterintuitively, its weakest condition is dead calm: with no breeze to tension the canopy, some designs sag until you reposition the poles. Shade also shifts as the sun moves, the open design offers no rain protection worth mentioning, and off the beach it’s nearly useless — the anchoring system needs sand or soft ground, so it won’t serve backyard duty. It is a specialist, brilliant inside its specialty.

    Who should buy it. Regular beachgoers on breezy coasts, walk-on beach visitors who carry everything, and families who want big shade without hauling a frame. If your beach has a daily sea breeze, this is the one to own — and our best overall.

    Who should skip it. Buyers who need one shade for beach, backyard, and tailgate — that’s canopy territory — and anyone who wants zero-thought setup on calm lake days, where the humble umbrella remains hard to beat.

    How we compared

    We compared the three shade architectures on the factors that decide whether a beach afternoon ends well: behavior in gusty onshore wind, usable shade area, one-person setup practicality, carry weight and bulk over soft sand, versatility beyond the beach, and price tier rather than exact prices, which vary widely by size and season. Because shade failures are overwhelmingly about design and anchoring rather than brand, we evaluated categories rather than individual models, and we weighted the failure patterns owners consistently report — runaway umbrellas, bent canopy frames, sagging sails in calm — over marketing claims. You’ll find our other head-to-heads in the Outdoors & Travel category.

    Frequently asked questions

    How windy is too windy for a beach umbrella?

    There’s no universal number, but a useful test is the flag test: if flags are standing straight out and sand is skimming along the surface, a single-pole umbrella is living on borrowed time no matter how well it’s anchored. In those conditions, tilt it low into the wind, or better, take it down — a folded umbrella never hurt anyone.

    Do sand anchors actually work?

    Yes — a screw-in auger or a buried anchor bag dramatically improves an umbrella’s hold, and owners consistently report they’re the difference between staying and chasing. The caveat is technique: the auger needs to reach damp, compacted sand, and the pole should lean slightly into the wind. An anchor used casually is barely an anchor.

    Can I use a pop-up canopy on the beach at all?

    Absolutely, with commitment: a filled sandbag on every leg, guylines staked deep at angles, and a spot with some natural shelter if you can find one. Calm-morning beach days with a canopy are wonderful. The mistake is treating sand like grass and wind like a maybe.

    Do shade products really block UV?

    Quality shade fabric carries a UPF rating, and higher is better — but remember that sand and water reflect UV up underneath any shade, so you can still burn while sitting in it. Treat shade as a supplement to sunscreen, not a substitute, especially for kids parked under it all day.

    Which shade is easiest to set up alone?

    The umbrella, by a comfortable margin — one person, two minutes, no instructions. A wind-sail is a solid solo job once you’ve done it twice. A full-size canopy is genuinely difficult alone; the frame wants a person on each end, which is worth knowing before you’re the only adult on the trip.

    Bottom line

    Ask what your afternoon usually does. If it stays calm and your party is small, the umbrella-plus-anchor remains the best few dollars in beach gear. If your shade also needs to work birthdays and tailgates — or your crew rolls deep with coolers and chairs — the canopy earns its bulk, on the strict condition that you anchor it like you mean it. But on the breezy ocean beach that this comparison is really about, the wind-sail shade is the design that treats wind as an ingredient instead of an enemy, and it’s the one we’d carry down the sand. Sorting out the rest of the summer kit? Our tent comparison and carry-on face-off apply the same match-the-gear-to-the-user logic.

  • Convertible Car Seats Compared: Graco vs Chicco vs Britax

    Convertible Car Seats Compared: Graco vs Chicco vs Britax

    Some links on our site may earn us a commission at no extra cost to you. Learn more.

    A convertible car seat is one of the longest-serving purchases you’ll make for your child — the same seat can ride along from the first year through preschool and beyond. That longevity is exactly what makes the choice feel heavy. Graco, Chicco, and Britax anchor the category with three distinct philosophies: Graco’s Extend2Fit line stretches value and extended rear-facing room; Chicco’s NextFit line obsesses over easy, confident installation; and Britax’s Boulevard/One4Life family leans premium, with plush materials and a click-tight installation system parents either love or find heavy.

    Before we compare a single cupholder, one thing needs saying plainly: every car seat legally sold in the United States must meet the same federal standard, FMVSS 213. This comparison is about usability, comfort, convenience, and value — not about which seat is “safer.” The safest seat for your family is the one that fits your specific vehicle, fits your specific child, and gets installed and buckled correctly on every single ride. Verify current certification and recall status with the manufacturer and NHTSA before buying or installing any seat, and follow the manual exactly.

    The quick answer: the Graco Extend2Fit is the value pick most families should start with; the Chicco NextFit Max is the one to choose if easy, confident installation is your top priority; and the Britax One4Life is the upgrade for parents who want premium build and one seat that converts through the booster years.

    Our verdict at a glance

    • Best overall value: Graco Extend2Fit — generous rear-facing legroom and core features at the friendliest price tier
    • Best for easy installation: Chicco NextFit Max — the most forgiving install experience of the three
    • Best upgrade: Britax One4Life — premium materials and a harness-to-booster lifespan in one seat
    • Best for small cars: Chicco NextFit Max — its fit flexibility helps in tight back seats, though you must confirm fit in your own vehicle
    • Best for extended rear-facing: Graco Extend2Fit — the extension panel is the category’s signature legroom feature

    How the three seats compare

    AttributeGraco Extend2FitChicco NextFit MaxBritax One4Life
    Installation experienceStraightforward; standard latch and belt pathsEasiest of the three; tensioning system owners praise mostClickTight system — very secure feel, heavier seat
    Rear-facing legroomExcellent — extension panel adds spaceGoodGood
    Usable lifespanRear-facing + forward harness (booster in some variants)Rear-facing + forward harnessRear-facing through high-back booster in one seat
    Cleaning & fabric careCovers generally easy to removeMachine-washable options; zip-off panels on many trimsPlush but more involved to strip and rewash
    Weight & bulkLightest of the threeMiddleweightHeaviest and bulkiest
    Price tier$$$$$$

    Graco Extend2Fit: the value benchmark

    Where it wins. The Extend2Fit’s namesake feature is a pull-out extension panel that adds real legroom in the rear-facing position — the single most useful convenience feature in this comparison, because it makes keeping a growing toddler rear-facing (which the American Academy of Pediatrics encourages for as long as the seat’s limits allow — confirm current guidance with your pediatrician) more comfortable and less contested. It’s also the lightest seat here, which matters if you ever move a seat between cars, and it delivers multi-position recline and easy-enough harness adjustment at the lowest price tier of the three. For families outfitting a second vehicle or grandparents’ car, it’s the obvious candidate.

    Honest drawbacks. The fabrics and padding are serviceable rather than plush, and owners consistently report the fit-and-finish gap versus Britax is noticeable side by side. The cupholders and harness pockets feel builder-grade. Installation is fine but rewards a careful read of the manual; it lacks the guided, confidence-building install experience Chicco built its reputation on. As with any seat, check that its dimensions work in your vehicle before committing — no spec sheet substitutes for trying the seat in your actual back seat.

    Who should buy it. Budget-conscious families, extended rear-facing households, and anyone buying a competent seat for a second car.

    Who should skip it. Parents who want premium comfort touches or a single seat that carries through the booster stage — that’s Britax territory.

    Chicco NextFit Max: installation confidence, bottled

    Where it wins. Ask experienced caregivers what they remember about the NextFit line and the answer is almost always the same: it goes in easily and it goes in right. The tensioning and leveling aids take most of the guesswork out of achieving a snug fit, and that matters enormously, because correct installation and harness use — not brand — are where real-world protection is won or lost. The Max variant adds room for bigger kids in the harness stage, the recline range is generous for fussy vehicle seat angles, and the washable fabric options are the most parent-friendly cleaning story of the three. Owners consistently describe it as the seat that made them stop second-guessing themselves.

    Honest drawbacks. It sits in the middle price tier while ending its service life at the end of the forward-facing harness stage — no booster mode — so families planning one-seat-forever should look at the Britax instead. It’s heavier than the Graco, and rear-facing legroom, while good, doesn’t match the Extend2Fit’s panel trick. The most common complaint is simply bulk in narrow three-across situations; if that’s your reality, measure carefully and confirm fit in your own vehicle.

    Who should buy it. First-time parents who want the least stressful install experience, households where multiple caregivers move or reinstall the seat, and anyone who prizes washable fabrics.

    Who should skip it. Anyone who wants booster-stage longevity from the same purchase, or the tightest budget — the Graco covers the essentials for less.

    Britax One4Life: the long-haul premium pick

    Where it wins. The One4Life is the “buy once” argument in physical form: rear-facing seat, forward-facing harness, and high-back booster in a single frame, with the plushest padding and most polished fit-and-finish in this comparison. Britax’s ClickTight installation system — open the seat bottom, thread the vehicle belt, click it shut — produces a rock-solid-feeling install using the seat belt rather than lower anchors, which many owners find uniquely reassuring, particularly in center-seat positions where anchor use is often restricted (check your vehicle manual). Harness adjustments are smooth, and the whole seat feels built for a decade of service.

    Honest drawbacks. It’s the most expensive seat here and by far the heaviest — moving it between vehicles is a genuine chore, and the most common owner complaint is exactly that. The plush cover is more tedious to remove and wash than Chicco’s. And the one-seat-for-every-stage pitch has a practical wrinkle: a seat used daily for eight or nine years will look and feel its age by the booster years, and every seat has a printed expiration date that caps its total service life regardless of stage — check it before counting on hand-me-down use.

    Who should buy it. One-car families who install once and rarely move the seat, parents who want premium comfort, and buy-once planners comfortable at the top price tier.

    Who should skip it. Anyone who frequently swaps the seat between cars, rideshare-heavy households, and tight budgets — a lighter, cheaper seat installed correctly serves them better.

    Features worth weighing — and ones that are mostly marketing

    After comparing spec sheets across these three lines, a pattern emerges in what actually changes daily life. Worth real weight: a no-rethread harness (all three offer versions of it — raising the headrest adjusts strap height without uninstalling anything), machine-washable covers, a wide recline range for awkward vehicle seat angles, and whatever installation aid gives you confidence, because a seat you install correctly beats one with a longer feature list. Worth much less than the brochures imply: cupholder counts, plushness beyond a reasonable baseline (toddlers nap fine in all three), and fabric trim names that add to the price tier without adding function.

    Budget accordingly: if choosing between a higher trim of a cheaper seat and the base trim of a pricier one, owners consistently report the base trims deliver nearly the whole experience. The money saved is better spent on a professional installation check — or simply banked for the booster years ahead.

    The non-negotiables, whichever seat you choose

    Treat these as required reading, not fine print. Verify the seat’s current FMVSS 213 certification and check for recalls on the manufacturer’s site and NHTSA’s registry. Confirm fit in your actual vehicle — seat angles, belt geometry, and back-seat width vary enormously, and a seat that installs beautifully in one car can fight you in another. Follow the installation manual and your vehicle’s manual exactly, including anchor weight limits and center-seat rules. Register the seat with the manufacturer so recall notices reach you. Have your installation checked by a certified child passenger safety technician — many fire stations and hospitals offer free checks. Never buy a used seat with unknown history, and replace any seat after a significant crash per the manufacturer’s policy. Finally, follow your pediatrician’s guidance on rear-facing duration and on safe sleep — a car seat is for travel, not routine sleeping outside the vehicle.

    How we compared

    We compared these seats strictly on ownership experience: installation ease, harness adjustment, rear-facing legroom, cleaning, weight, vehicle-fit flexibility, usable lifespan per dollar, and the patterns of praise and complaint that emerge from long-term owners. We made no attempt to rank crash protection — all three meet the same federal standard, independent crash-test nuances change with every model revision, and correct installation and use matter more than brand differences. Price appears as tiers ($ to $$$) because street prices shift constantly. This guide is part of our Family & Kids series, alongside our baby monitor comparison for the other big nursery-stage decision.

    Frequently asked questions

    Is a more expensive convertible car seat safer?

    Price buys comfort, convenience, and lifespan — not certified safety. Every seat sold new in the US must meet FMVSS 213. A correctly installed budget seat serves a child better than an incorrectly installed premium one, which is why installation ease deserves real weight in your decision.

    When should I switch from an infant seat to a convertible?

    When your child approaches the infant seat’s height or weight limit, or when carrying the bucket becomes impractical — commonly somewhere around the first year, but the seat’s printed limits and your pediatrician’s advice are the real triggers, not the calendar.

    How long should my child stay rear-facing?

    Current guidance from the American Academy of Pediatrics is to remain rear-facing as long as the seat’s height and weight limits allow. Confirm the up-to-date recommendation with your pediatrician, and note that generous rear-facing room — the Extend2Fit’s specialty — makes following that guidance more comfortable.

    Do car seats really expire?

    Yes — every seat carries a manufacturer expiration date, typically stamped on the shell, reflecting material aging and evolving standards. Check it before buying, before reusing a seat for a second child, and especially before accepting any hand-me-down.

    Will these seats fit three-across in my back seat?

    Maybe — and nobody can promise it from a spec sheet. All three are on the wider side of the market, with the Britax the bulkiest. Measure your bench, check the manufacturer’s width figures, and if possible test-fit before buying; a certified child passenger safety technician can help you evaluate the combination.

    Bottom line

    All three are excellent seats from established brands, so let your household’s realities pick: the Graco Extend2Fit for the best value and rear-facing legroom, the Chicco NextFit Max for the install experience that removes doubt, and the Britax One4Life for premium build and one-seat-through-booster longevity. Then do the part that actually matters most, whichever box comes home: verify certification and recalls, confirm fit in your vehicle, install exactly per the manual, register the seat, and get the installation checked. The best seat is the one used correctly, every ride.

  • Clumping Clay vs Crystal vs Tofu Litter: The Cat Litter Comparison

    Clumping Clay vs Crystal vs Tofu Litter: The Cat Litter Comparison

    Some links on our site may earn us a commission at no extra cost to you. Learn more.

    Few pet purchases inspire as much quiet, ongoing frustration as cat litter. It is a product you buy forever, haul home constantly, and interact with daily — and yet most owners pick a type once, early on, and never revisit the decision. That is a shame, because the three dominant litter technologies solve the litter-box problem in fundamentally different ways. Clumping clay locks liquid into scoopable balls. Silica crystal absorbs and dehydrates waste while letting you scoop only solids. Tofu litter, the fast-rising plant-based option, clumps like clay but weighs a fraction as much and can often be flushed in small amounts where local plumbing and regulations allow.

    The trade-offs are real and they compound over years: dust that settles on every surface near the box, tracking that migrates across your floors, weight you carry up the stairs, odor control that fades at different rates, and — most importantly — whether your cat will actually use the stuff. A litter that is perfect on paper is worthless if your cat stages a protest beside the box.

    Quick answer: clumping clay remains the default for good reason — cats accept it readily and it is cheap and effective — but tofu litter is the better choice for owners bothered by dust and weight, and crystal suits low-maintenance households that prefer less frequent full changes.

    Our verdict at a glance

    • Best overall: Clumping clay — the most reliable cat acceptance, strong odor control, and easy scooping
    • Best budget: Clumping clay again — no other type matches its cost per month of use
    • Best upgrade: Tofu litter — lightweight, low-dust, flushable in many areas, and gentler on paws
    • Best for low-maintenance routines: Crystal (silica) — scoop solids, stir, and change the whole box on a schedule

    Head-to-head comparison

    AttributeClumping clayCrystal (silica)Tofu (plant-based)
    Odor controlVery good, fades between scoopsExcellent for urine, weaker on solidsGood, best when scooped daily
    DustHighest of the threeLow, but fine particles on pouringLowest overall
    TrackingModerate to heavyModerate — pellets bounceLight to moderate, easy to sweep
    Weight to carryHeavyLightVery light
    DisposalTrash onlyTrash onlyTrash; small amounts often flushable where allowed
    Price tier$$$$$

    Clumping clay: the incumbent for a reason

    Clumping clay is built on sodium bentonite, a clay that swells dramatically on contact with liquid and binds urine into a firm, scoopable ball. That single property is why it has dominated litter boxes for decades: scoop twice a day and the box stays reasonably fresh, with odor locked inside the clumps rather than radiating from the pan.

    Where it wins: acceptance and cost. Most cats instinctively take to the fine, sandy texture — it is the closest of the three to what a cat would dig in outdoors — which makes clay the safest choice for kittens graduating to a new home, newly adopted adults, and any cat with a history of litter-box pickiness. It is also, by a comfortable margin, the cheapest way to run a litter box, and it is sold everywhere in every scent and formula imaginable.

    Honest drawbacks: weight and dust are the two complaints owners raise most consistently. A month of clay for a multi-cat home means hauling serious weight, and even “low-dust” formulas throw a visible cloud when poured, which matters if you or your cat has respiratory sensitivities. Clay also tracks — those fine grains travel on paws — and it is strictly landfill-bound: never flush clay, and mined bentonite is the least environmentally friendly option here. Used clumps are heavy, and a neglected box turns into a cemented mess along the pan floor.

    Who should buy it: first-time cat owners, multi-cat households watching costs, and anyone whose cat has previously rejected alternative litters. Who should skip it: households with dust-sensitive people or cats, upstairs apartments where hauling weight is a chore, and owners prioritizing environmental footprint.

    Crystal (silica) litter: the low-maintenance specialist

    Crystal litter takes a completely different approach. Instead of clumping, its porous silica gel beads absorb urine and let the moisture evaporate, trapping odor in the process. You scoop solids daily, stir the crystals to distribute saturation, and replace the entire box on a schedule — typically every few weeks for one cat — rather than continually topping up.

    Where it wins: urine odor control and routine simplicity. A fresh box of crystals is remarkably effective at keeping ammonia smell down, and many owners of single-cat households love the “scoop solids, stir, forget” rhythm. The beads are far lighter than clay, most formulas are very low-dust, and because nothing clumps, you never chisel cement off the pan. Crystal is also the standard media for several self-cleaning and tray-style litter systems, so if you are heading toward automation, you will likely end up here anyway.

    Honest drawbacks: the failure mode is abrupt. Crystals work beautifully until they reach saturation, and then odor control collapses quickly — the most common complaint is a box that smelled fine on Tuesday and unmistakable by Thursday. Solid-waste odor is only as controlled as your scooping discipline, since nothing encapsulates it. Some cats dislike the pebble texture underfoot, a few will chew stray beads (discourage this and keep bags sealed away), and the round beads bounce and scatter when kicked. Per month it costs more than clay, and the all-at-once change means you throw out the entire box contents on schedule regardless.

    Who should buy it: single-cat or two-cat homes that want the least day-to-day fuss, owners of compatible self-cleaning boxes, and people highly sensitive to urine odor. Who should skip it: multi-cat households (saturation arrives fast and costs climb), texture-sensitive cats, and homes with kittens young enough to taste-test their litter.

    Tofu litter: the modern challenger

    Tofu litter is made from soybean by-products extruded into small cylindrical pellets, sometimes blended with corn starch or other plant material. It clumps on contact with liquid like clay does, but the resemblance ends there: the pellets are dramatically lighter, produce very little dust, and break down in water — which is why manufacturers advertise flushability in small quantities, subject to your plumbing, septic situation, and local regulations.

    Where it wins: the daily experience. Pouring tofu litter raises almost no dust, carrying a bag home is trivial, and the soft pellets are gentle on sensitive paws — including cats recovering from declaw procedures they should never have had, or seniors with tender feet. Clumps form well and scoop cleanly, disposal is more flexible than either rival, and the plant-based material composts in some municipal programs. Owners who switch from clay consistently report the reduction in dust and floor grit as the change they notice first.

    Honest drawbacks: it costs meaningfully more than clay per month, and odor control — while good with daily scooping — generally trails a premium clumping clay once you fall behind. Humid climates are unkind to it: because the pellets absorb ambient moisture, an open bag can soften or, in the worst cases, grow mold, so airtight storage matters. Some cats need a gradual transition to accept the pellet texture, and because the material is technically edible-adjacent, a litter-snacking kitten needs supervision. Flushing deserves caution rather than enthusiasm: small amounts only, never with septic systems unless the manufacturer and your local rules explicitly allow it.

    Who should buy it: dust-sensitive households, apartment dwellers who value light weight and flexible disposal, and eco-minded owners willing to pay a modest premium. Who should skip it: strict budget shoppers, homes in very humid climates without good storage, and cats who have already voted firmly for sandy textures.

    How we compared

    We compared the three litter technologies on the factors that decide daily satisfaction: odor control over a realistic scooping schedule, dust at pour and during digging, tracking beyond the box, weight and storage practicality, disposal options, cat acceptance, and monthly cost by price tier rather than exact prices, which vary constantly by brand and bag size. Our assessments reflect how each material behaves by design, the experiences owners report most consistently across brands, and manufacturer guidance on use and disposal. We treat cat acceptance as the veto factor throughout — no litter attribute matters if the cat refuses the box — and we recommend discussing persistent litter-box avoidance with your vet, since it can signal health issues rather than preference.

    Frequently asked questions

    How do I switch my cat to a new litter type?

    Gradually. Mix roughly a quarter of the new litter into the old for several days, then half, then three-quarters, watching for hesitation at each stage. If your cat starts avoiding the box at any point, drop back a step. An abrupt full swap is the most common cause of protest accidents, and for anxious cats a second box with the new litter alongside the old one works even better.

    Is any of these litters truly flushable?

    Only tofu (and some other plant-based) litters are marketed as flushable, and even then the honest answer is “sometimes, carefully.” Flush only small amounts, never into septic systems unless explicitly approved, and check local regulations — some regions prohibit flushing any cat waste. Clay and crystal must never be flushed; clay in particular swells and can block pipes outright.

    Which litter is safest for kittens?

    Very young kittens explore with their mouths, so most guidance favors avoiding clumping clay until around eight weeks or later — swallowed clumping litter can swell internally. Plant-based pellets are generally considered the gentler option for the youngest cats, but supervision matters with any litter, and your vet is the right person to ask if your kitten is a persistent litter-eater.

    Does litter type affect how much water my cat should drink?

    No — but the litter box is where many owners first notice hydration changes, since urine clump size and frequency are easy to track with clumping litters. If you see a sudden change in either direction, mention it to your vet. Encouraging cats to drink more is its own topic; our comparison of stainless, ceramic, and plastic pet fountains covers the most effective gadget for it.

    How often should I fully change the box?

    With clumping clay and tofu, scoop daily and do a full empty-and-wash roughly every few weeks, sooner for multiple cats. With crystal, the full change is the core routine — follow the bag’s guidance and change earlier if odor returns. Whatever the material, a bigger box, one box per cat plus one spare, and an unscented formula solve more litter problems than any brand switch.

    Bottom line

    If you want one recommendation: stay with (or start with) a quality unscented clumping clay, because it is the litter your cat is most likely to accept and your budget will barely notice. Move to tofu litter if clay’s dust, weight, or environmental profile bothers you — it is the most pleasant litter to live with day to day and the easiest upgrade to justify. Choose crystal if your priority is a simple routine with strong urine-odor control in a one- or two-cat home, and you will stay disciplined about full changes. Let your cat cast the deciding vote, transition slowly, and involve your vet if box habits change. For more head-to-head comparisons for every pet in the house, browse our pets category.

  • Best Camping Tents Under $300: Dome vs Cabin vs Instant Pitch

    Best Camping Tents Under $300: Dome vs Cabin vs Instant Pitch

    Some links on our site may earn us a commission at no extra cost to you. Learn more.

    Under $300, the tent market splits into three distinct personalities, and picking among them matters far more than picking among brands. Dome tents are the classic crossed-pole design: aerodynamic, storm-shedding, and light enough to carry away from the car. Cabin tents trade that wind profile for near-vertical walls and standing headroom, turning a campsite into something closer to a canvas room. Instant-pitch tents — with pre-attached telescoping poles that unfold in a minute or two — sell the one thing every arriving camper wants at 8 p.m. on a Friday: speed.

    The frustrating part is that each style is genuinely the best choice for somebody. The family that camps three calm summer weekends a year has no reason to suffer a crouched-over dome. The couple that camps in shoulder-season wind has every reason to avoid a tall, flat-walled cabin. And anyone who has wrestled color-coded poles in the dark understands exactly why instant tents exist. Under $300 you can get a very good version of any of these — but not a tent that does all three jobs at once.

    Quick answer: buy a dome if weather resistance and versatility matter most, a cabin if livable space for a family is the priority, and an instant tent if setup speed is the thing that actually gets you camping more often.

    Our verdict at a glance

    • Best overall: A quality dome tent — the most weather-capable, versatile, and durable design in the under-$300 class
    • Best budget: A basic dome — entry-level domes deliver more storm protection per dollar than any other style
    • Best upgrade: A full-height cabin tent with a robust rainfly — the most comfortable way for a family to camp under $300
    • Best for impatient setup crews: An instant-pitch cabin — from bag to standing in a couple of minutes, with honest trade-offs in weight and weather

    How the three tent styles compare

    AttributeDomeCabinInstant pitch
    Price tier (under $300 class)$–$$$$–$$$$$–$$$
    Setup timeModerate — 10–20 minutesSlowest — 15–30 minutesFastest — often under 5 minutes
    Wind and storm resistanceBest — low, rounded profile sheds gustsWeakest — tall flat walls catch windFair — cabin-shaped versions share cabin weaknesses
    Headroom and livabilityLimited — crouching near the wallsBest — standing height, vertical wallsGood — most are cabin-styled inside
    Packed weight and bulkLightest and most compactHeavy and bulkyHeaviest — poles stay attached
    Long-term durabilityVery good — simple, replaceable polesGood — more seams and zippers to wearMixed — hub and hinge mechanisms are the weak point

    Dome tents: the storm-tested default

    Where it wins. The dome’s crossed-pole geometry is popular for the same reason it has barely changed in decades: it works. The curved profile lets wind slide around the tent instead of slamming into a wall, flexible poles bend and recover in gusts that would snap rigid frames, and rain runs off the rounded fly with nowhere to pool. Domes are also the lightest and most packable style here — the only one of the three you could plausibly carry a short distance from the car — and their simple pole structure means a snapped section is a cheap field fix rather than a dead tent. In the under-$300 class, dome money goes further: mid-tier dome pricing buys full-coverage rainflies, aluminum poles, and quality zippers that cabin-tent pricing spends on sheer square footage.

    Honest drawbacks. The same curved walls that shed wind steal living space. Rated capacity is optimistic in every tent style, but domes feel it most — a “four-person” dome is a snug fit for two adults and their gear, and only the center offers full headroom. Changing clothes involves a certain amount of yoga. Setup is honest work: threading or clipping poles takes ten to twenty minutes and is far easier with two people.

    Who should buy it. Couples, solo campers, anyone who camps in spring and fall as well as high summer, and anyone whose sites might be exposed to real wind. If you only buy one tent, buy this style — it is the best overall pick because it fails least often in the situations that matter.

    Who should skip it. Families of four or more who camp exclusively in fair weather. For them, the dome’s storm pedigree solves a problem they rarely have, at the cost of comfort they’d feel every trip.

    Cabin tents: rooms with a view

    Where it wins. Nothing under $300 changes the feel of a campsite like a cabin tent. Near-vertical walls mean the floor space on the label is space you can actually use, adults can stand upright to dress, and features like room dividers, giant doors, and screened porches turn a weekend into something civilized. For families, the livability difference is not subtle — kids get a play space on rainy afternoons, air mattresses fit without wall-crowding, and the huge windows keep everything ventilated on hot nights. Owners consistently describe the upgrade from dome to cabin as the moment family camping stopped feeling like an endurance event.

    Honest drawbacks. Those tall flat walls are sails. In gusty conditions a cabin tent flexes, rattles, and — inadequately staked — can fail outright; this is the style’s defining weakness and no sub-$300 model escapes it. Many budget cabins also ship with partial-coverage rainflies that leave big windows exposed to driving rain, so the most common complaint is weather intrusion in storms the tent’s size implicitly promises to handle. They are heavy, bulky in the trunk, slow to pitch, and their many zippers and seams give time more to work on.

    Who should buy it. Fair-weather family campers at sheltered, drive-up campgrounds — which is honestly a large share of all campers. As an upgrade pick for comfort, nothing else here comes close. Pair it with a proper cooler from our YETI vs RTIC vs Coleman comparison and a campsite starts feeling like a cottage.

    Who should skip it. Anyone camping exposed sites, shoulder seasons, or forecast-be-damned weekends. When the wind arrives, you will trade every square foot of standing room for a lower profile.

    Instant-pitch tents: speed as a feature

    Where it wins. Instant tents attach the poles permanently to the canopy with telescoping or folding hubs, so setup becomes: unfold, extend, click. What takes twenty minutes with a conventional tent takes two or three, and takedown is nearly as fast. That speed is worth more than it sounds — it means arriving after dark is fine, short one-night trips stop feeling like too much effort, and a single adult can pitch camp while wrangling children. Most instant tents use a cabin-style shape, so you get respectable headroom in the bargain. For campers whose real obstacle is activation energy, an instant tent genuinely produces more camping.

    Honest drawbacks. The convenience is bought with mechanical complexity. Those hubs, hinges, and telescoping joints are the failure points, and unlike a standard dome pole, a broken hub is rarely field-repairable and often means replacing the tent. Packed size is the bulkiest of the three styles because the poles never fully separate, and the weight is substantial. Weather protection is typically the thinnest here too: many instant models wear short cap-style rainflies, and their cabin geometry inherits cabin wind behavior. The most common owner complaint after a few seasons is a sticky or cracked pole joint, not torn fabric.

    Who should buy it. Frequent short-trip campers, festival-goers, parents pitching solo, and anyone who has ever abandoned a camping weekend because setup felt like a chore. Buy the version with the most substantial rainfly you can find in budget.

    Who should skip it. Buyers who expect a decade of service, campers in wet or windy regions, and anyone tight on trunk space — a conventional dome packs smaller, weighs less, and will likely outlive it.

    How we compared

    We compared the three design categories rather than individual models, because under $300 the architecture determines the experience far more than the badge does. Our attributes are the ones that decide real trips: setup time and whether one person can manage it, wind and rain behavior, usable interior space versus rated capacity, packed bulk, and the long-term failure patterns owners consistently report for each style. We use price tiers within the under-$300 class rather than exact prices, which move constantly with seasons and sales, and where a weakness is inherent to a design — cabin walls in wind, instant-tent hubs — we attribute it to the design rather than to any single product. Browse the rest of our outdoor comparisons in the Outdoors & Travel category.

    Frequently asked questions

    Is a tent’s person rating accurate?

    Treat it as a maximum-occupancy figure for sleeping shoulder to shoulder with no gear. The comfortable rule across all three styles is to subtract two: a six-person tent suits four people, a four-person tent suits two. Cabin tents come closest to honest ratings because their vertical walls don’t shrink the usable floor.

    Can a cheap tent handle rain?

    Often yes — if you help it. Look for a full-coverage rainfly, seam-sealed construction, and a bathtub-style floor, then add a ground sheet and re-treat the seams before the first trip. The style matters too: a modest dome with a full fly will outperform a much larger cabin with a partial fly in the same storm.

    Are instant tents less durable than regular tents?

    The fabric is comparable; the mechanism is the difference. Pre-attached hub-and-hinge frames add failure points that conventional shock-corded poles don’t have, and they’re harder to repair or replace. Careful owners get years of service, but a conventional dome remains the safer bet for longevity.

    What matters most for camping in wind?

    Profile and anchoring. A low, rounded dome pitched with every stake and guyline in use will ride out gusts that flatten taller tents. Whatever style you own, stake it fully every time, orient the smallest face into the wind, and use the guylines — most wind failures owners report trace back to skipped stakes, not bad tents.

    Should I spend the full $300 or start cheaper?

    If you’re new to camping, a budget dome is the smart first tent: the style is forgiving and the money at risk is small. Upgrade toward the top of the class once you know your pattern — families drift toward cabins, frequent short-trippers toward instant pitch, and all-season campers toward better domes. Camp first, specialize second.

    Bottom line

    Under $300, you’re not choosing a brand — you’re choosing which compromise you can live with. The dome asks you to crouch and rewards you with weatherproofing and longevity; it’s our overall pick because bad weather is the one variable you can’t schedule around. The cabin asks you to watch the forecast and rewards you with genuine comfort, making it the right upgrade for fair-weather families. The instant tent asks you to accept mechanical risk and rewards you with trips that actually happen. Decide which promise matters most, and the rest of the kit — cooler, shade, even the bag you pack for the trip — falls into place around it. And if your camping leans beach-ward, our shade comparison is the natural next read.